
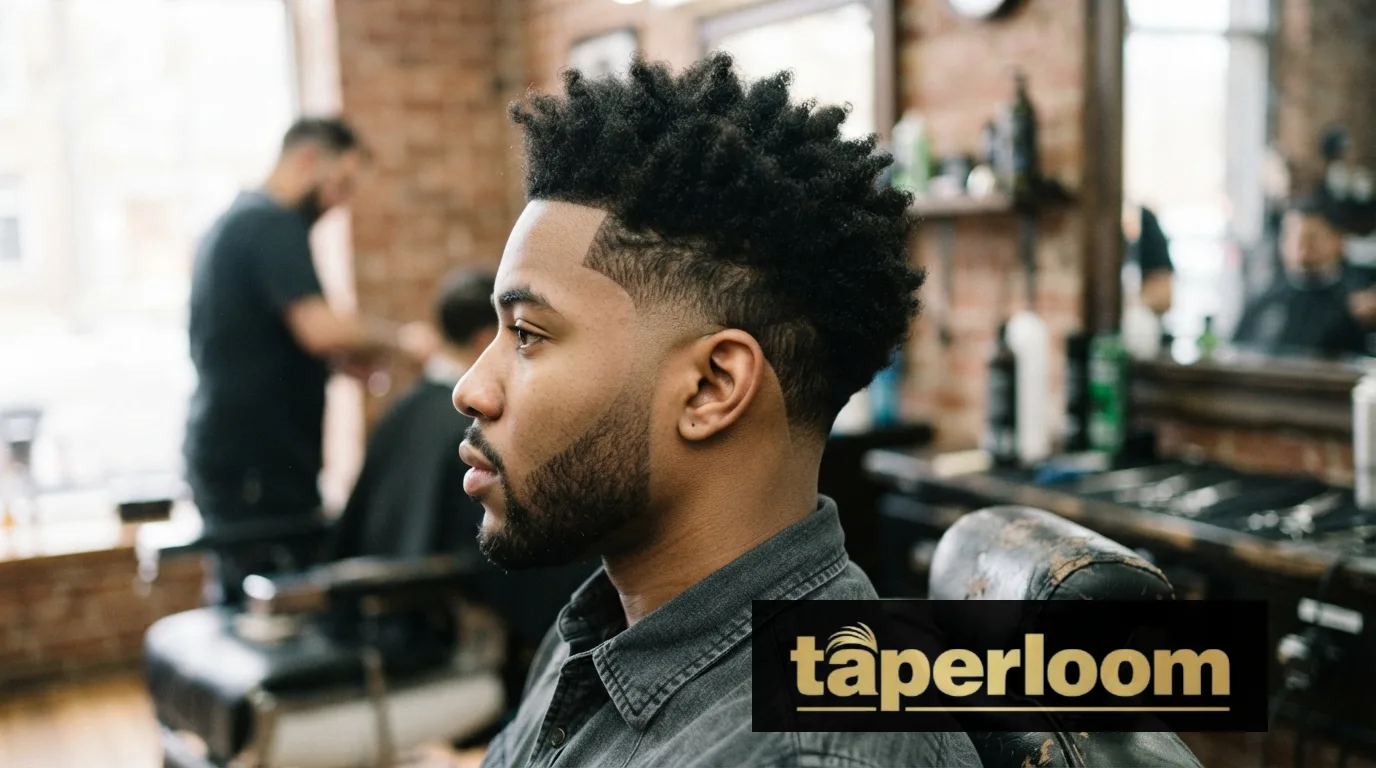
A taper low burst fade is a men’s haircut that combines a low taper on the sides and neckline with a curved burst fade that wraps around the ear in a half-circle.
Unlike a straight-line fade, the burst curves instead of cutting flat, which is why it pairs so well with curly hair, textured tops, and mullets.
The low placement keeps things close to the ears and neckline, so the cut reads clean without going too short.
This guide walks you through what the cut actually is, who it suits, the exact words to use with your barber, and how to keep the curve sharp between visits.
If you want to see the shape in more variations first, our low taper fade designs guide is a good starting point.
Quick Answer Box
- A taper low burst fade pairs a low taper on the sides with a curved burst that arcs around the ear.
- The fade stays low near the ears and neckline, so more length stays on the sides than a mid or high fade.
- It works best on curly, wavy, and coily hair, and pairs with tops ranging from a short crop to a full mullet.
- Most guys need a touch up every two to four weeks to keep the curve looking crisp.
- It’s conservative enough for school or office settings while still having real shape.
What Is a Taper Low Burst Fade
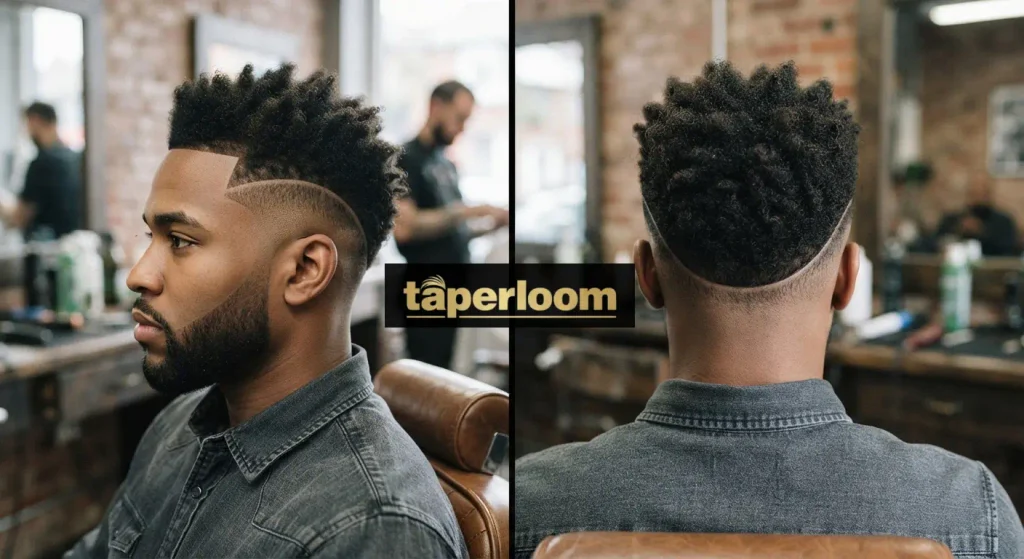
A taper low burst fade is a haircut that blends a gradual taper on the sides with a curved burst fade wrapping around the ear.
The two techniques work together instead of separately, and that combination is what gives the cut its name.
The taper handles the sides and neckline. Hair gets gradually shorter as it moves toward the ears and nape, and it doesn’t have to go all the way down to skin.
This part of the cut is soft and grow out friendly, which is why barbers often recommend it to first time fade clients.
The burst is the curved detail. Instead of running in a straight line down the side of the head, the fade arcs around the ear in a half circle, tightest right at the ear and fanning outward from there.
This rounded side profile is what separates a burst fade from a plain taper fade or a straight line low fade.
Because the low taper keeps things close to the neckline and the burst adds curve instead of a hard edge, the cut sits well under longer or textured hair on top.
That’s a big part of why it shows up so often on curly hair, coily hair, and wavy hair rather than short, flat styles.
Taper vs Low Fade vs Burst Fade
taper vs low fade vs burst fade side by side comparison
These three terms get mixed up constantly, and asking for the wrong one is how people end up with a haircut they didn’t want. Here’s how they actually differ.
| Term | What it describes | Skin showing | Best paired with |
|---|---|---|---|
| Taper | A gradual, subtle shortening toward the neckline and ears | Little to none | Straight or wavy hair, low maintenance looks |
| Low fade | Where the fade starts, close to the ears and neckline instead of higher up | Moderate, depending on contrast | Most hair types, office friendly styles |
| Burst fade | The curved shape that arcs around the ear instead of running in a straight line | Depends on the taper or fade underneath it | Curly hair, mullets, textured fringes |
A taper describes how gradual the shortening is. A low fade describes where the fade starts on the head. A burst fade describes the shape the fade takes around the ear.
A taper low burst fade uses all three at once: a taper for the gradual shortening, a low placement for where it starts, and a burst for the curved shape.
Taper vs Burst Fade
The main difference between a taper and a burst fade is what each term describes. A taper focuses on the gradual reduction of hair around the ears and neckline, while a burst fade focuses on the curved fade pattern around the ear.
This is why a taper burst fade can combine a clean taper with the distinctive shape of a burst fade.
Burst Fade vs Taper Fade
A burst fade and taper fade are not necessarily opposite haircut choices. A burst fade describes the shape around the ear, while a taper describes how gradually the hair gets shorter. A taper burst fade can therefore combine both techniques in the same haircut.
Burst Fade vs Low Taper
A low taper keeps the shortening subtle and close to the ears and neckline. A burst fade creates a curved shape around the ear. When these are combined, a low taper burst fade gives you a cleaner, more subtle version of the burst style without taking the fade too high.
What Is a Burst Fade?
A burst fade is a fade that curves around the ear rather than continuing evenly around the back and sides of the head.
The amount of skin showing can vary depending on how short the barber takes the fade. A burst fade can also be combined with different taper levels, including a burst fade mid taper, depending on the height and overall shape you want.
If you want more height and contrast instead, a mid taper fade starts higher on the head and creates a bolder line.
Anatomy: Guard Numbers and Angles
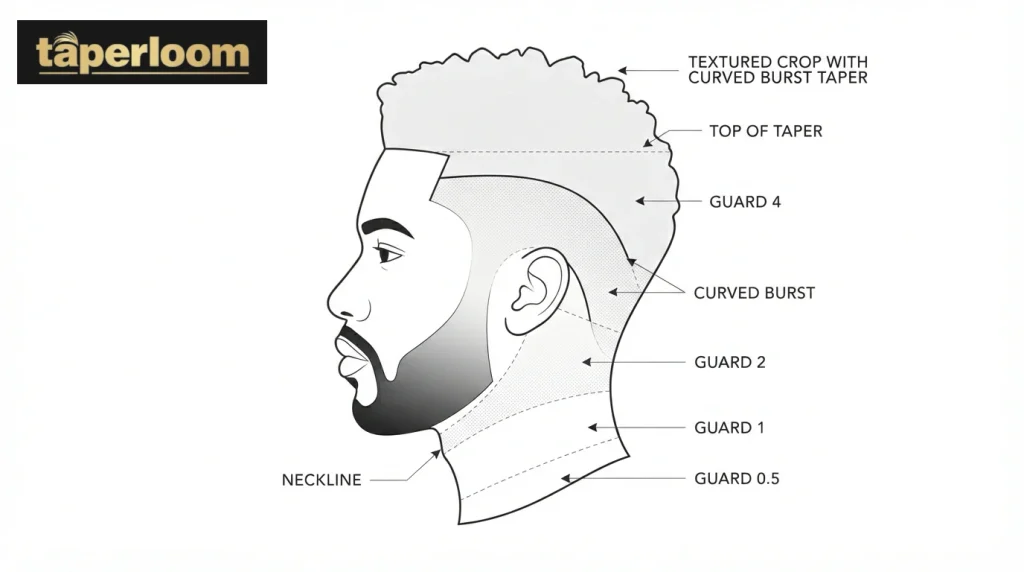
Knowing the rough guard numbers and angles behind a taper low burst fade helps you understand what your barber is actually doing, and it gives you a way to double check the cut before you leave the chair.
- Bottom of the taper (neckline and around the ears): Usually clipper guard #1 or #0.5, sometimes finished with a bare blade for a crisp edge right at the hairline.
- Mid blend zone: Guard #2 to #3, blended upward with a clipper over comb technique so there’s no visible line between lengths.
- Top of the taper, where it meets the sides: Guard #3 to #4, depending on how much length you want to keep.
- The burst curve around the ear: Cut freehand, following the natural curve of the ear rather than a straight guard line. This is the part that separates a burst from a standard taper fade.
- Blend angle: The clippers move in an arc, not a straight downward stroke, radiating out from the ear at roughly a 45 degree sweep to create the half circle shape.
- Back of the head: Blended to match the burst curve so it doesn’t create a visible seam where the sides meet the back.
These numbers are a starting point, not a fixed rule. Hair density, growth pattern, and how low you want the fade to sit will shift the exact guards your barber reaches for. If you keep the top buzzed short, our low taper fade buzz cut guide has a fuller guard chart broken down by style.
Who It Suits (Face Shape and Hair Type)
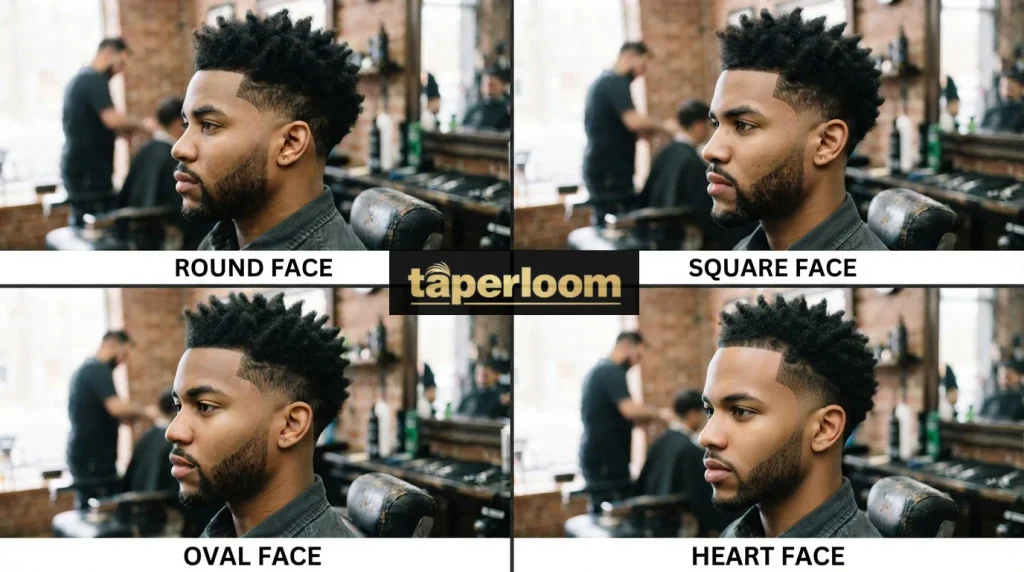
A taper low burst fade flatters a wider range of faces and hair textures than a high or skin fade would, mainly because the low placement and curved shape are naturally softer.
Face Shape
| Face shape | How it reads | What to ask for |
| Round | Softens edges further | Keep real length and volume on top for balance |
| Square | Suits this cut well | The curve softens a strong jaw instead of sharpening it |
| Oval | Works with almost any version | No proportion needs correcting |
| Oblong | Works with almost any version | Same flexibility as oval |
| Heart shaped | Balances a narrow chin | A bit more volume on top, low fade for balance |
Hair Type
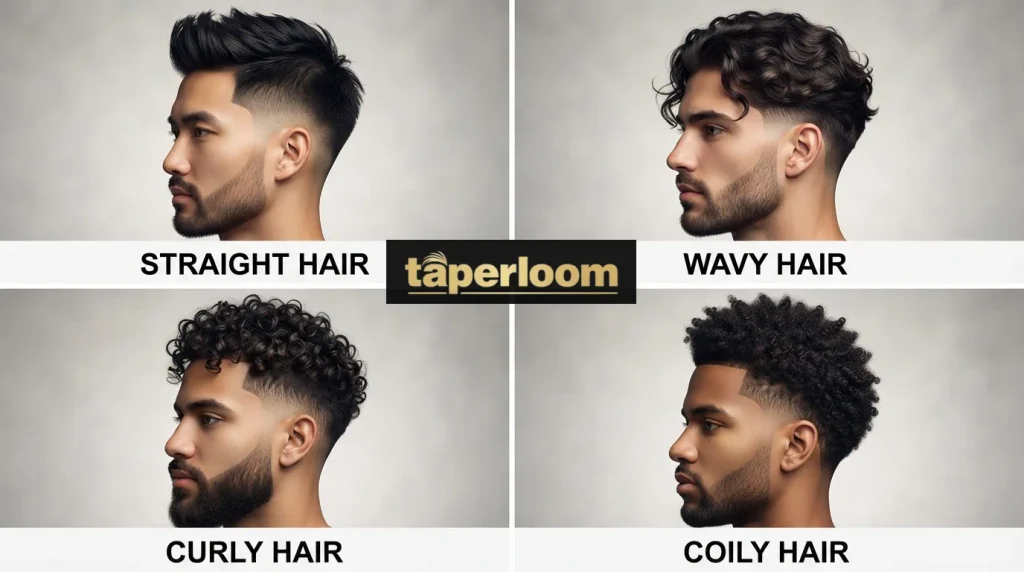
- Straight hair takes this cut well, especially with a textured top, since the curved fade shows up clearly against straight strands. Our low taper fade for straight hair guide covers styling in more depth.
- Wavy hair is one of the easiest textures to work with. Natural movement plays nicely off the curve.
- Curly hair is where the burst really earns its place. It keeps curls full on top while the fade controls everything underneath, and our curly hair fade guide walks through the full styling routine.
- Coily hair works well too. The rounded burst complements natural coily texture, and a low fade means less exposed skin to grow out unevenly.
Best Styles to Ask For
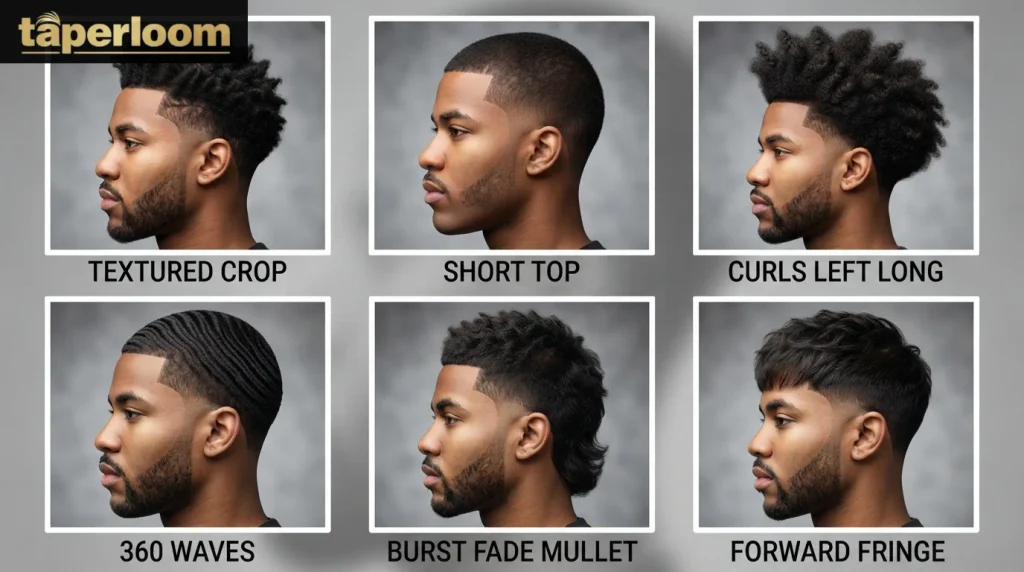
The fade stays constant, but what you do on top changes the entire personality of the cut. Here are the most requested options.
- Textured crop: The most popular pairing. A slightly messy, lived in finish that suits most face shapes and takes seconds to style.
- Short top: The lowest effort version. Our low taper fade on short hair guide covers this pairing in detail.
- Curls left long: A genuinely low maintenance combo for curly hair, similar to the looks in our low taper fade long hair guide.
- 360 waves: The low fade keeps the sides tidy without competing with a brushed wave pattern.
- Burst fade mullet: The back stays long for a classic silhouette while the sides stay clean and low. See our burst fade mullet styles for more variations.
- Forward fringe: Reads softer and more youthful. Our textured fringe with low taper fade guide breaks down length and product choices.
- Mohawk fade: A strip of length down the center works especially well with the curved burst framing it.
How Much Does It Cost
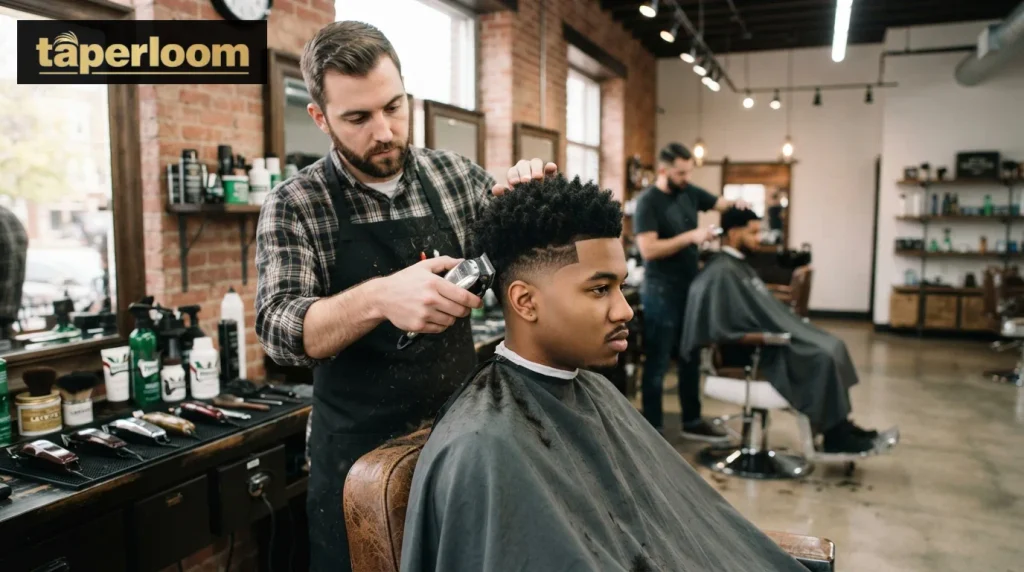
Pricing depends more on the barbershop’s tier than on the city, though location does shift things somewhat. Because the burst curve takes more time and precision than a plain taper, expect to pay a bit more than a standard fade.
| Barbershop tier | Typical price range | What you’re paying for |
| Budget or chain barbershop | $15 to $25 | Quick service, less time on the curve detail |
| Standard local barbershop | $25 to $45 | More precision on the burst, standard wait time |
| Premium barbershop or salon | $45 to $75+ | Extra time on blending, often includes a hot towel or beard line up |
Curly or coily hair sometimes adds a small surcharge, since the burst takes longer to blend cleanly through denser texture. It’s worth asking upfront rather than getting surprised at checkout.
How to Ask Your Barber
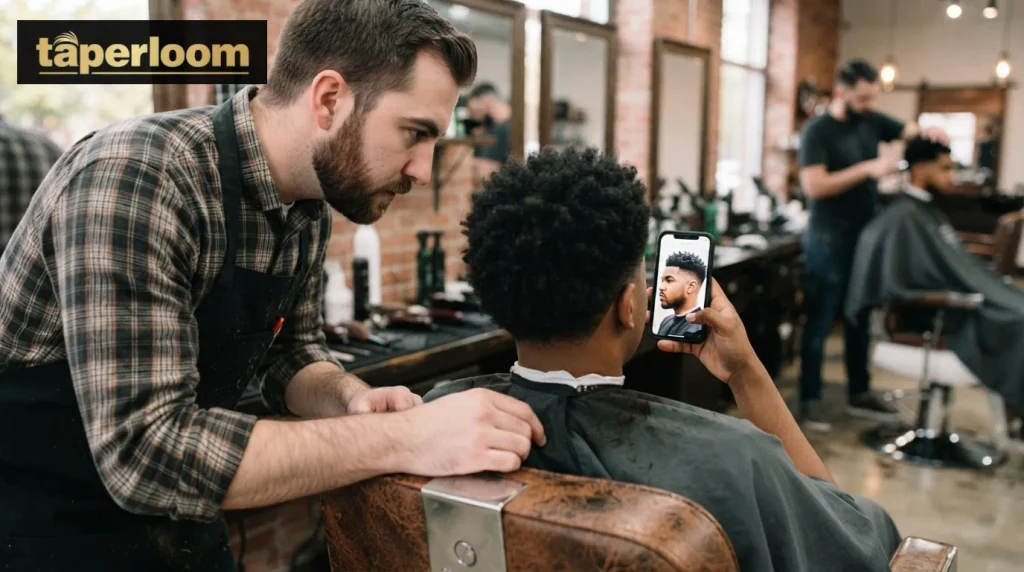
Even with a clear picture in your head, vague instructions get you a different haircut. Barbers see a lot of clients in a day, so being specific saves you the awkward conversation at the end.
“I’d like a low taper fade that curves around my ear in a burst shape, not a straight line. Keep the fade low near my neckline and ears, and leave [length] on top.”
Swap in “textured,” “curly,” “short,” or “a bit longer for a fringe” depending on what you’re after. If a fringe is part of the plan, our low taper fade fringe haircuts guide has more barber wording specific to that style.
- Bring a reference photo from the side and back, since the burst detail is hard to judge from the front alone.
- Mention your hair type. A curly burst and a straight one are cut differently.
- Give an actual length for the top instead of “not too short.”
- Confirm the fade stays low. It’s the most common thing that quietly creeps higher than planned.
For Barbers: Cutting Technique
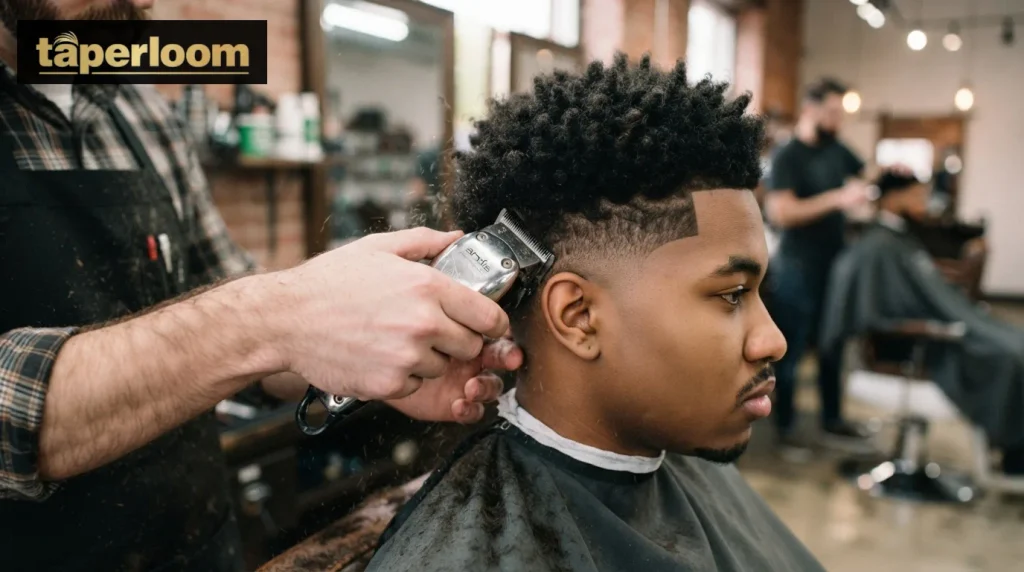
Getting the burst curve right takes more precision than a standard taper. Here’s the general workflow most barbers follow.
- Section and assess. Comb the hair dry first to check density, growth pattern, and how low the client wants the fade to sit before touching the clippers.
- Set the guideline. Cut a low guideline around the ear and down the neckline using a #1 or #0.5 guard, following the natural hairline rather than a straight edge.
- Blend the base. Work clipper over comb from the guideline upward, switching to a #2 and then a #3 guard as you move up the head, keeping every pass overlapping the last.
- Shape the burst. Switch to freehand clipper work around the ear. Move in a curved, sweeping motion that follows the ear’s shape instead of a straight downward stroke, radiating the fade outward like a fan.
- Connect to the back. Blend the burst into the back of the head so there’s no visible seam where the curve meets the rest of the fade. This is the step that gets rushed most often.
- Check from multiple angles. Step back and check the curve from the side, back, and top. A burst that looks clean from the front can still be uneven from behind.
- Clean the edges. Line up the neckline and sideburns last, using a trimmer for crisp final edges without disturbing the blend underneath.
- Final dry check. Style the top the way the client wears it and check the fade once the hair falls naturally, since wet hair can hide an uneven blend.
Grow Out Timeline
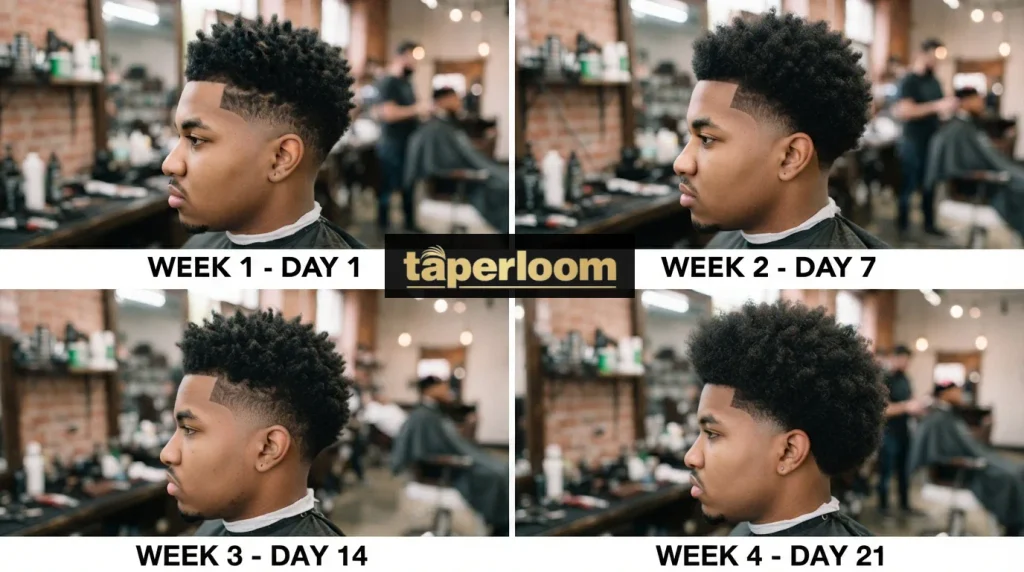
The curve is the first part of the cut to lose its shape, so knowing what to expect each week helps you plan touch ups instead of getting caught off guard.
| Timeframe | What happens | What to do |
| Week 1 | The fade still looks crisp, curve is sharp and well defined | Nothing needed, maybe a light neckline cleanup |
| Week 2 | Neckline and sideburn hair starts filling in first | A quick trimmer touch up at home keeps it tidy |
| Week 3 | The burst curve starts to soften and blur at the edges | Most guys book a barber visit around now |
| Week 4 | The fade blends into the surrounding length and the shape is mostly gone | Last point before a full recut is needed to restore the curve |
Hair that grows quickly, or a fade cut tight to begin with, tends to land closer to the two to three week end. A softer, longer version can stretch closer to four weeks before it starts looking off.
Maintenance Schedule
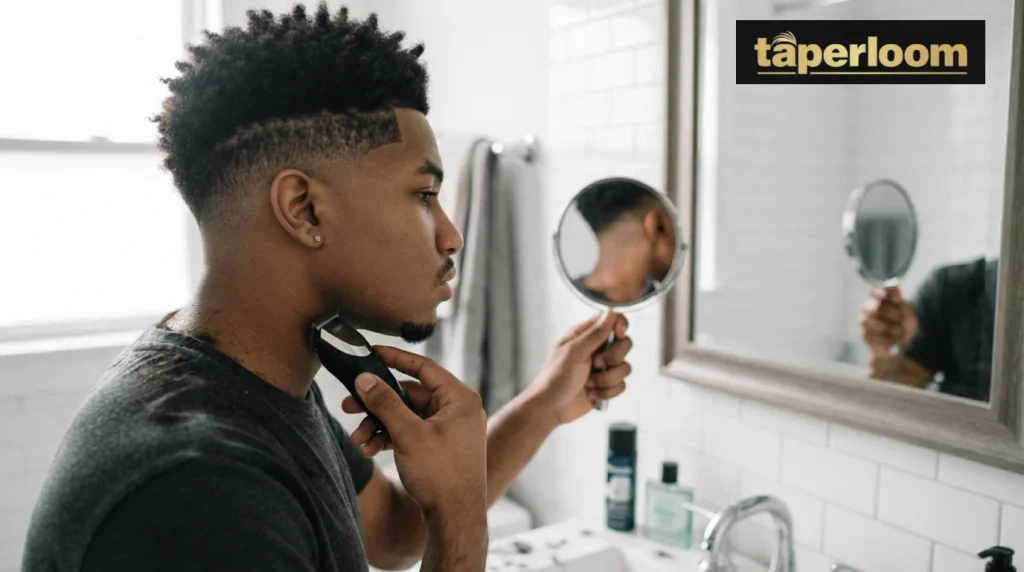
A burst fade relies on a precise curve, and that curve is the first thing to go as hair grows. It tends to look overgrown faster than a plain taper, especially around the ear and neckline.
- Book a barber visit every two to four weeks to keep the curve crisp. Tighter cuts sit closer to the two to three week mark.
- A short or textured top hides regrowth reasonably well between visits.
- A mullet or fringe is more forgiving too, since the eye goes to the length rather than a perfectly fresh fade line.
- For the neckline, a trimmer with a close guard works at home, but go slow and follow your natural hairline instead of carving a hard straight edge.
- For sideburns, take off small amounts at a time. It’s easy to overshoot, and uneven sideburns throw off the whole look even when the rest of the fade is still clean.
Mistakes That Ruin the Cut
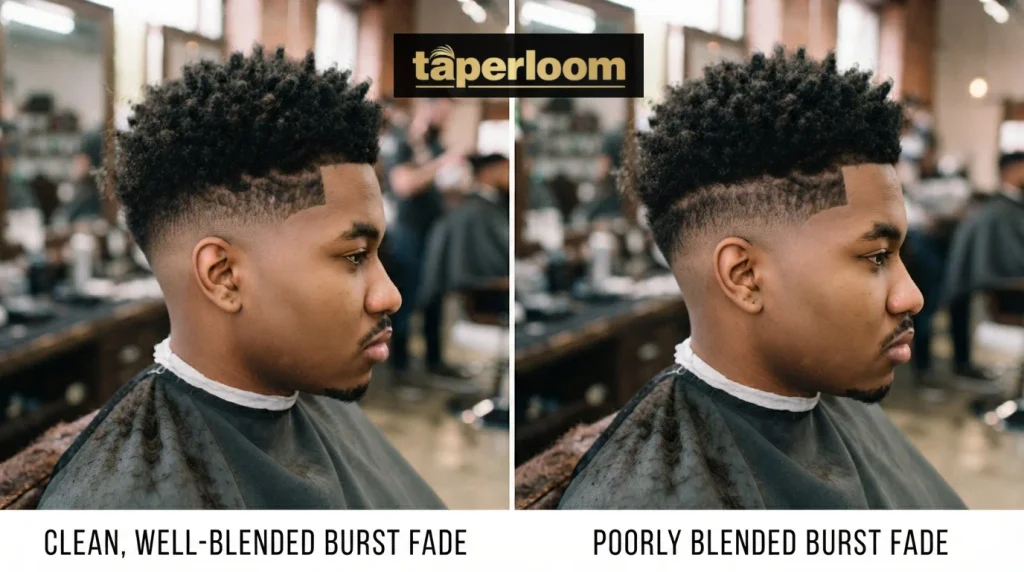
Most problems with this haircut happen at the chair rather than at home, and they’re easy to avoid once you know what to watch for.
- Letting the fade creep up: A low fade quietly turns into a mid or high over repeat visits. Fix it by confirming with your barber each time that the fade stays low.
- Over cutting around the ear: Strip too much hair away and the burst flattens into an ordinary fade. Fix it by bringing a clear side and back reference photo.
- A poorly blended back: Shows up a week or two later as a visible line where the burst meets the rest of the hair. Fix it by asking your barber to check the blend from behind before you leave.
- Skipping the hair type conversation: Curly and straight hair blend differently, and skipping this leads to an uneven curve. Fix it by mentioning your texture upfront.
- No length given for the top: “Not too short” means something different to everyone. Fix it by giving an actual length or a photo.
Styling at Home
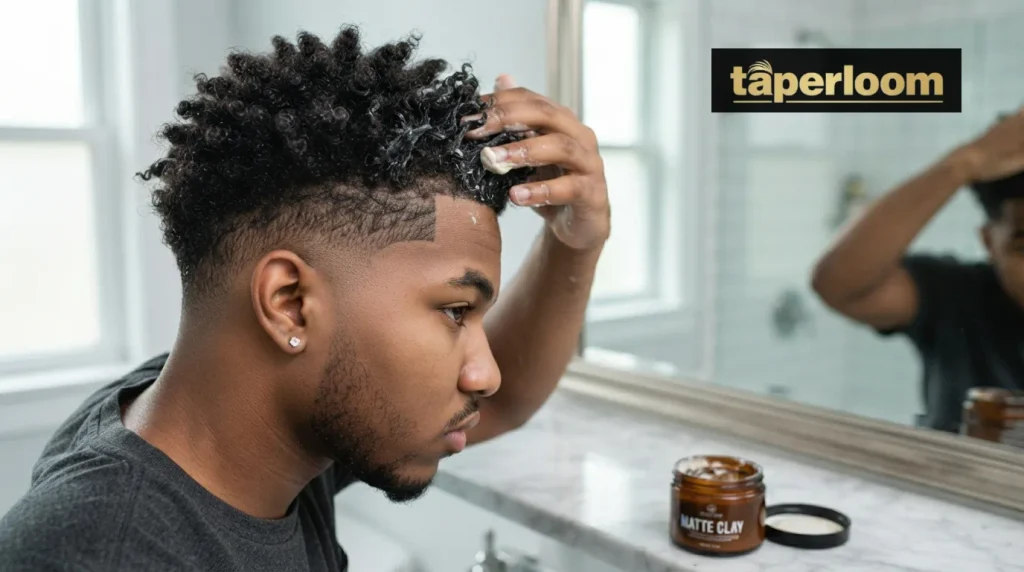
The cut does most of the work, so your daily routine can stay short. Here’s a simple routine that works for most top lengths.
- Start with damp, towel dried hair rather than soaking wet.
- Warm a pea sized amount of product between your fingers before applying it.
- Work it through by hand rather than with a comb for a more natural finish.
- Lift at the roots with your fingertips if you want height and volume, or press it down for a sleeker shape.
- Finish by checking the burst area specifically, since flattened hair there can hide the curve’s definition.
Most barbers recommend this cut slightly dry and textured rather than glossy. A matte clay adds definition without shine and suits most casual and work settings. A light pomade works if you want a bit of sheen for a slicker style. Texture powder is worth reaching for if your hair is fine or straight and tends to fall flat, since it adds grip and root volume.
How to Choose & Place a Burst Fade Design
Choosing the right burst fade design comes down to three things: where you want the design, how much faded space you have, and how well the pattern works with your hair type. The cleanest results usually follow the natural curve of the fade around the ear instead of cutting across it.
Where Should You Place a Burst Fade Design?
The most common placement is around or behind the ear, directly within the faded section. This gives the design enough contrast to stand out while keeping it connected to the haircut.
For a subtle look, a single curved line or small shaved detail can sit close to the ear. If you want a bolder style, the pattern can extend toward the back of the head or connect with the longer hair above the fade.
The key is to leave enough space between the pattern and the natural fade transition. This keeps the haircut looking clean rather than crowded.
Match the Design to Your Fade Height
Your fade height determines how much room you have for a shaved pattern.
- Low burst fade: Smaller curved lines and simple details work well because the faded area is closer to the ear.
- Mid burst fade: Offers more room for double lines, geometric shapes, stars, and other medium-sized patterns.
- High burst fade: Creates a larger faded area for more detailed or noticeable designs.
Whatever pattern you choose, its direction should complement the semicircular shape of the burst fade around the ear.
Choose a Design for Your Hair Type
Hair texture affects both the visibility and overall appearance of a shaved design.
Straight hair can create strong contrast between the design and the faded sides, making sharp lines easy to see.
Curly and wavy hair can give the haircut more texture, while a clean fade helps define the design around the sides.
Thick or coarse hair may require a wider faded area so the pattern does not disappear as the surrounding hair grows.
If your hair has a strong growth pattern, your barber can adjust the direction and placement of the design to work with it.
Which Designs Work Best With a Burst Fade?
The best pattern depends on how noticeable you want the haircut to be. Simple designs are easier to wear, while detailed patterns create a stronger statement.
Popular options include:
- Single or double curved lines
- Lightning bolt designs
- Stars
- Geometric shapes
- Initials or letters
- Small symbols
- Creative line patterns
A simple design often works best when the burst fade itself is the main feature. More detailed artwork can work well when there is enough faded space to keep each line clearly separated.
Use a Reference Photo Before Your Haircut
A clear reference photo is one of the easiest ways to explain the design placement, size, and shape you want. Try to choose a photo that shows the side and back of the haircut rather than only the front.
When speaking with your barber, mention:
- Your preferred fade height
- Where you want the design placed
- How large you want the pattern
- Whether you want simple lines or detailed artwork
- Whether the design should extend toward the back
Your barber can then adapt the reference to your head shape, hair density, hairline, and natural growth direction.
Keep the Design Balanced With the Haircut
A burst fade already creates a strong curved shape around the ear. Adding too many lines in the same small area can make the haircut look busy.
For a balanced result, the design should follow the flow of the fade and leave enough negative space between individual lines. The goal is for the shaved pattern to look like part of the haircut rather than an element placed on top of it.
How Long Does a Burst Fade Design Last?
A shaved design becomes less defined as the hair grows. The sharpest lines usually look best immediately after the haircut, while regular fade touch-ups can help maintain the contrast and shape.
Simple patterns generally require less maintenance than intricate designs. If you do not want frequent barber visits, choose a design with fewer lines and a clear shape.
School and Teens vs Work and Office
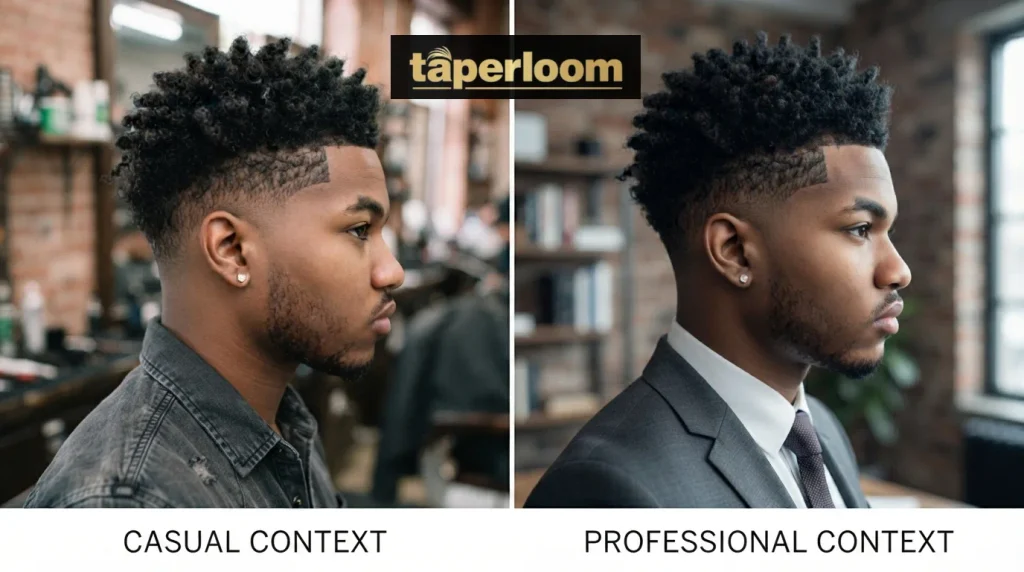
School and Teens
The taper low burst fade works well for school aged guys because the low placement keeps it within most dress code rules while still having some personality. A short or medium top keeps it simple and low maintenance, which matters if you’re relying on a parent for barber visits rather than booking your own. Our low taper fade for kids guide covers age-specific styling and barber wording parents can use directly.
Work and Office
For office settings, the same low placement reads as clean and professional rather than trendy. Keeping the top short or medium is the safest formal friendly version, since a longer fringe or mullet leans more casual. The curve itself isn’t the issue in professional settings, it’s usually the length on top that determines how buttoned up the whole look feels.
Taper Low Burst Fade vs Blowout Taper
A blowout taper uses a normal taper on the sides, and the “blowout” refers to the styling on top, blow dried up and out for volume. The fade line itself isn’t different, the comparison is really about the top and the upkeep it demands.
| Factor | Taper low burst fade | Blowout taper |
| Side profile | Defined curve does the work with little daily effort | More height and fullness on top, less defined side line |
| Daily styling | Minimal, a couple minutes with product | Requires blow drying most mornings to hold shape |
| Barber visits | More frequent, every two to four weeks to keep the curve tight | More forgiving as it grows out, no precise line to maintain |
| Best for | Guys who want low daily effort and don’t mind regular barber trips | Guys who enjoy styling and want more volume on top |
Neither is a clear winner. It comes down to which kind of upkeep you’d rather do, barber visits or daily styling. If the volume-forward look sounds more like you, browse our blowout taper styles for the full technique and product breakdown.
FAQs
Is a burst fade the same as a taper fade?
No. A taper fade is a gradual fade in general, while a burst fade specifically curves around the ear. This cut combines both.
What’s the difference between a burst fade and a drop fade?
A drop fade curves down behind the ear toward the nape. A burst fade arcs around the ear and stays higher, keeping more length at the back.
How often will I need a touch up?
Usually every two to four weeks. Tighter cuts sit closer to two or three weeks.
Does it work with curly hair?
Very well. The curved line follows natural curl patterns better than a straight fade does.
Is a low burst fade good for round faces?
Yes, especially with extra length and volume on top for balance.
What do I tell my barber?
Ask for a low taper that curves around the ear in a burst shape, and give a length for the top.
Is this haircut high maintenance?
It’s moderate. It needs regular barber touch ups, but daily styling stays quick.
Can I get this cut with straight hair?
Yes, straight hair actually shows the curved line very clearly, giving the fade a sharp, defined look.
How much does it cost?
Typically $25 to $45 at a standard barbershop, more at premium shops due to the extra blending time.
Is it appropriate for school or work?
Yes, the low placement keeps it conservative enough for most dress codes, especially with a short or medium top.
Related Guides
Picked a direction? Each style, hair type, and decision below has its own dedicated guide:
- Low Taper Fade Designs for Men — The complete overview, 70+ styles
- Low Taper Fade Curly Hair — Full styling guide by texture
- Low Taper Fade Straight Hair — Top styles and product picks
- Low Taper Fade Mullet Haircuts — The bolder, longer back variation
- Textured Fringe With Low Taper Fade — The fringe forward version
- Low Taper Fade Fringe Haircuts — More fringe pairings and barber specs
- Low Taper Fade for Kids — Age guide and barber script for parents
- Low Taper Fade on Short Hair — Real barber advice for short tops
- Low Taper Fade Long Hair — Styles for keeping length up top
- Low Taper Fade Buzz Cut — Guard chart and buzzed-top pairing

Muhammad Kaleem is a content creator who writes about hair care, hairstyles, grooming, and everyday hair trends. He enjoys turning hair-related topics into simple, practical, and easy-to-understand content that helps readers make informed choices about their hair and personal style.