
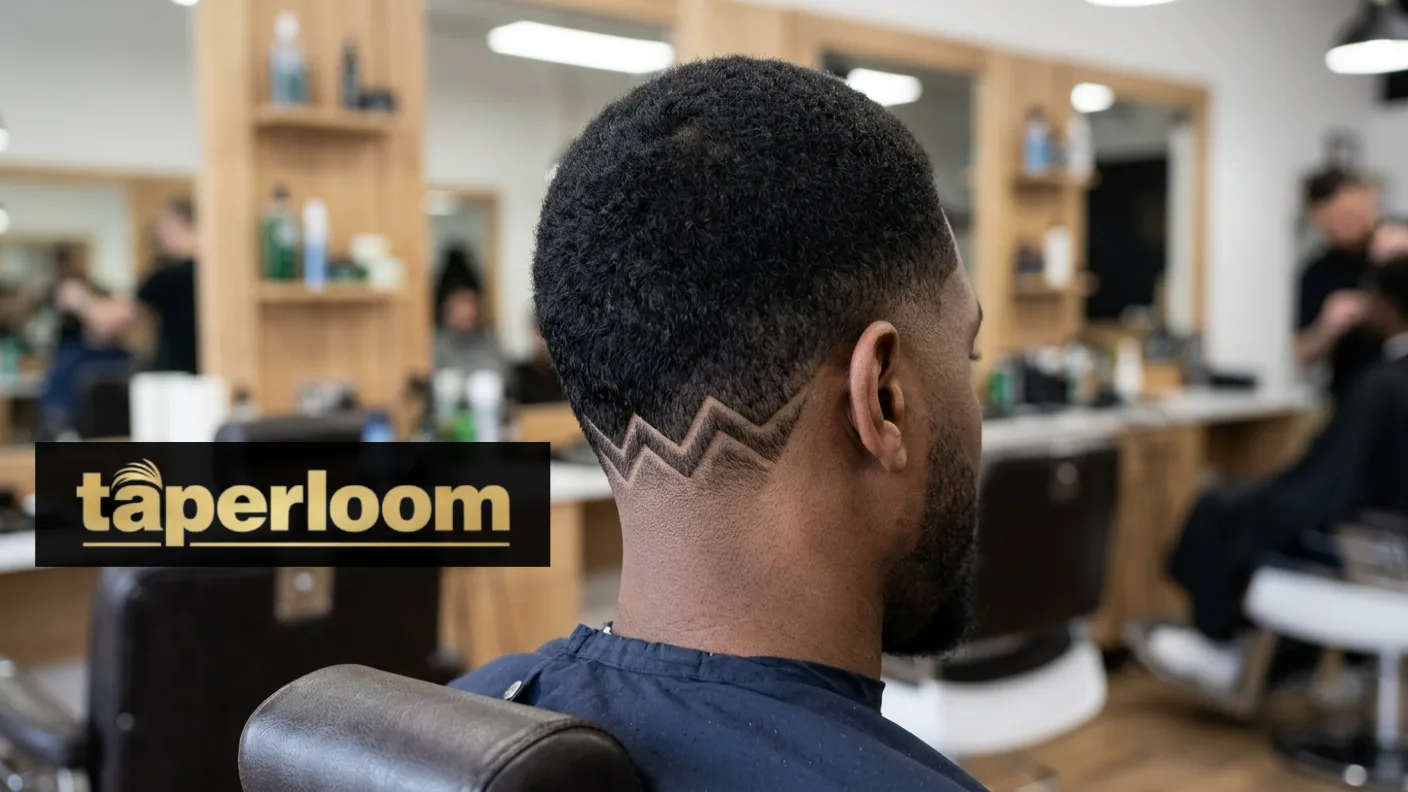
YA low taper fade is already a clean cut. Add a carved design to it, and it stops being just another fade you saw on Pinterest it becomes your cut.
That’s the real appeal behind low taper fade designs right now. Skilled barbers are turning the fade zone into a canvas: zigzags at the nape, thin lines above the sides, freehand art that took years of steady practice to carve clean.
Whether you want something loud enough to photograph or subtle enough to pass a dress code, there’s a design that fits.
This guide covers 70+ low taper fade designs for men back, side, freestyle, and Edgar cut combos broken down by placement, hair type, and face shape. You’ll also get exact barber tips and scripts to ask for each one, plus a full breakdown of cost, maintenance, and the most common mistakes guys make when they walk in unprepared.
Let’s find your next haircut.
What Is a Low Taper Fade Design?
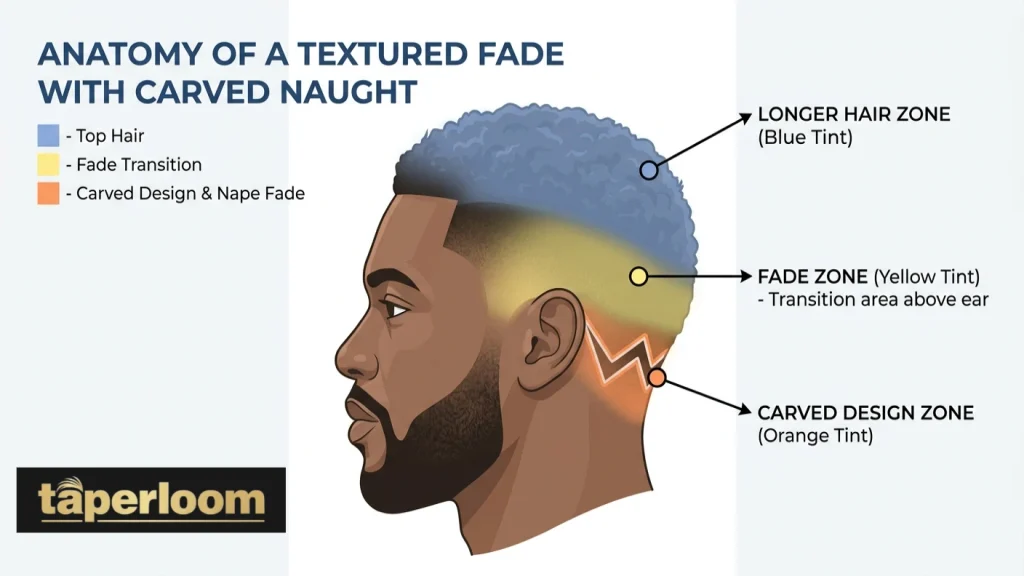
A low taper fade design is a men’s haircut that pairs a smooth, gradual fade, starting just above the ears, with a custom pattern shaved into the faded zone using a T-outliner, detailer trimmer, or straight razor.
Designs range from a single clean line to full freestyle artwork, and they typically hold their sharpness for 7 to 14 days before regrowth starts to soften the edges.
Fast Facts:
- The nape (back of the head) is the most popular placement, it has the sharpest fade contrast for a design to sit in
- A carved design usually adds $10 to $30 to a standard fade
- Simple designs (single lines, small geometric shapes) hold their shape longer than freestyle or portrait style work
- Every hair type can carry a design, but dark and afro textured hair shows the boldest contrast
Low Taper vs Skin Fade vs Mid Taper: Full Comparison
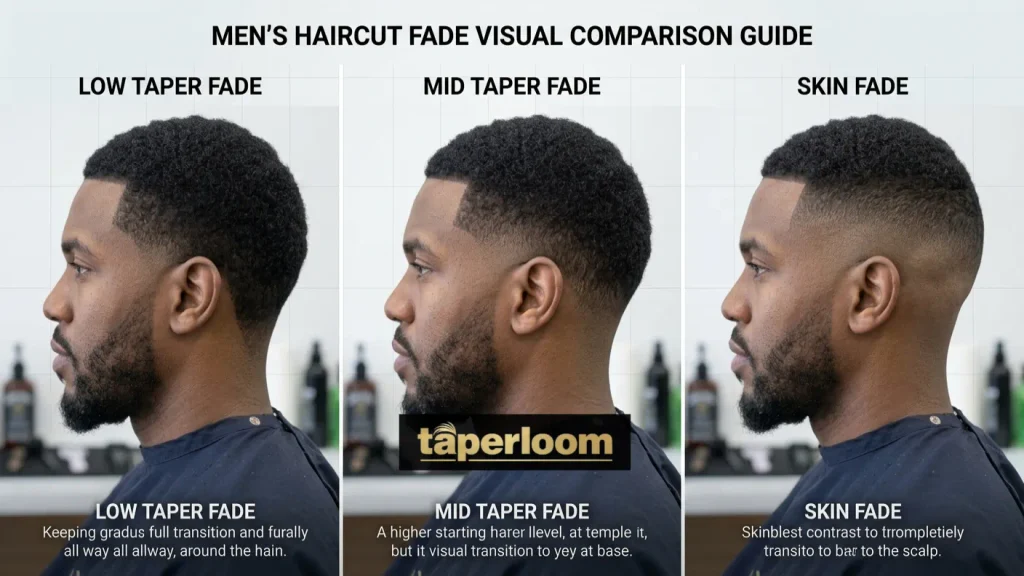
Before you pick a design, you need to understand what it’s sitting on. The fade underneath decides how bold your design looks, how long it holds, and how much maintenance you’re signing up for.
Here’s how the three most common fade heights stack up for design work.
| Feature | Low Taper Fade | Mid Taper Fade | Skin Fade |
| Fade start point | Just above the ears and nape | Mid way up the sides, above the ear line | Anywhere on the head, down to skin |
| Hair at the bottom | Yes, soft and natural | Yes, slightly shorter | No, bare scalp visible |
| Design contrast | Clean and subtle | Sharper than low, more visible | Most dramatic, highest contrast |
| Best for | First timers, office settings, understated looks | Guys who want more visibility without going bold | Bold designs, freestyle art, statement pieces |
| Maintenance | Every 3 to 4 weeks | Every 2 to 3 weeks | Every 2 weeks |
| Professional friendly | Very | Mostly | Depends on the design |
The short version: a low taper fade gives you the most understated base, so your design reads as a detail rather than the whole point of the haircut. A mid taper sits in between. A skin fade turns the design into the main event, since the contrast against bare skin is much sharper.
If this is your first time getting a design, start with a low taper. You can always go bolder on your next cut once you know what you like.
Key Tip: Ask your barber to show you all three fade heights on a reference chart before you commit. “Low” means something slightly different to every barber, so a visual reference removes the guesswork.
70+ Best Low Taper Fade Designs for Men (2026 Gallery)
Back and Nape Designs
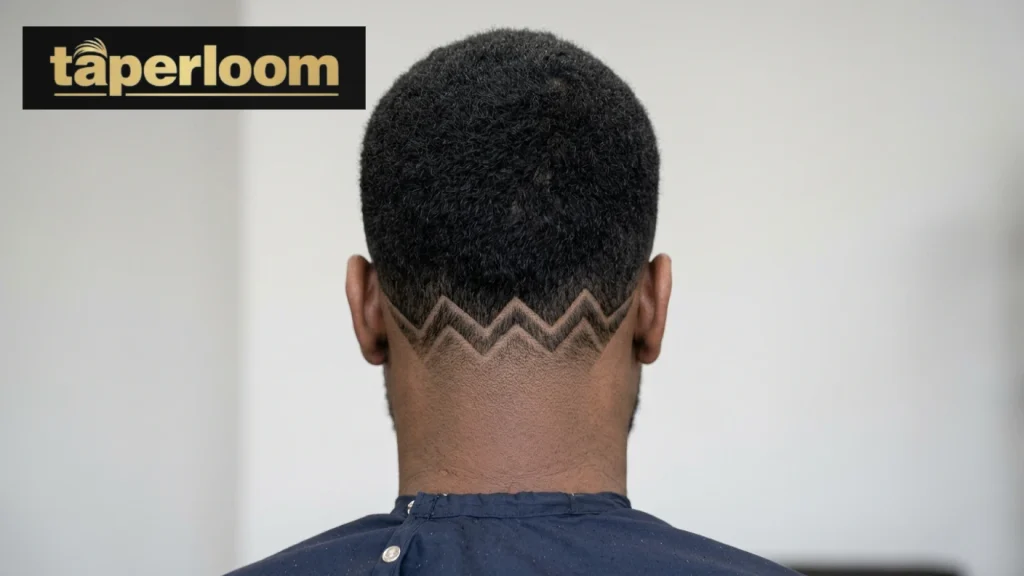
The back of the head is the most requested placement for a carved design, and it’s easy to see why. The nape sits right where the fade gradient is sharpest, so any pattern carved there gets maximum contrast.
It’s also the spot most people notice first when you walk away from them, which makes it a favorite for guys who want their haircut to make a statement from behind.
Here are 13 back taper fade designs, each with what hair type it suits and exactly how to ask for it.
1. Zigzag Nape Design
A sharp Z pattern carved just above the nape. This is one of the most searched back designs online right now, and it holds up especially well on dark hair, where the contrast between skin and hair reads instantly.
- Best for: thick hair, dark hair, afro textured hair
- Barber tip: “A zigzag pattern etched into the nape, keep the lines symmetrical and blend the fade around it.”
2. Single Line Nape Design
One clean, straight razor line across the nape. It’s the easiest design to maintain and the most versatile, since it works with almost any top style.
- Best for: all hair types, professional settings
- Barber tip: “One horizontal line at the nape, thin and precise, keep it clean.”
3. Double Line Nape Design
Two parallel lines etched just above the neckline. It adds rhythm without going loud, and it photographs well from behind.
- Best for: straight hair, wavy hair
- Barber tip: “Two thin parallel lines at the nape, evenly spaced.”
4. Triple Line Nape Design
Three crisp lines in a row above the neckline. This one leans street style and looks best when the top stays simple, think crew cut or buzz cut.
- Best for: curly hair, wavy hair, dark hair
- Barber tip: “Three parallel lines, uniform spacing, clean razor edges.”
5. Starburst Nape Design
A radiating pattern carved from a central point at the nape. It’s one of the harder designs to pull off, so it needs a barber with a steady hand and real experience.
- Best for: close cropped tops, buzz cuts
- Barber tip: Bring a clear reference photo and ask if your barber has done starburst work before. Experience matters more here than with any other design on this list.
6. Geometric Diamond Design
A symmetrical diamond shape carved at the nape. Clean, structured, and it reads as intentional rather than decorative.
- Best for: dark hair, short tops
- Barber tip: “A symmetrical diamond pattern at the nape, keep the edges crisp.”
7. Wave Pattern Nape Design
Flowing, curved lines that mimic the movement of a wave. It sits naturally with textured hair, since the carved lines echo the hair’s own movement.
- Best for: wavy hair, curly hair
- Barber tip: “Fluid curved lines at the nape that echo wave movement.”
8. Arrow Nape Design
A downward pointing arrow centered at the nape. Simple, masculine, and it holds its shape well for a week or two.
- Best for: straight hair, close cropped tops
- Barber tip: “A centered arrow pointing down at the nape, thin lines, clean tip.”
9. Lightning Bolt Nape Design
A bold bolt shape carved into the back of the neck. It’s expressive and works well combined with color highlights for extra contrast.
- Best for: dark afro textured hair, curly hair
- Barber tip: Bring an image reference. Both angles of the bolt need to mirror each other exactly, so symmetry matters more than speed here.
10. Cross Nape Design
A symmetrical cross or X carved at the nape. It works even on fine or thin hair, since the shape holds up without needing a dramatic fade underneath it.
- Best for: fine hair, straight hair
- Barber tip: “A clean cross pattern centered at the nape, equal arm lengths.”
11. Curved Line Nape Design
An arc instead of a straight line, following the natural curve of the neckline. Softer and more organic than a straight razor line.
- Best for: round and oval head shapes
- Barber tip: “A curved line at the nape that follows my natural neckline, keep it soft.”
12. Checkerboard Nape Design
A small grid pattern carved into a compact section at the nape. It’s less common than a single line, which makes it a good option if you want something that still reads as understated.
- Best for: short, dark hair
- Barber tip: “A small checkerboard pattern at the nape, keep the squares even and tight.”
13. Fan Pattern Nape Design
Short lines radiating outward in a half circle, like an open fan. It sits close to a starburst but reads slightly softer and less busy.
- Best for: afro textured hair, curly hair
- Barber tip: “A fan pattern at the nape, lines spread evenly from one base point.”
Key Point: The nape has the sharpest fade gradient anywhere on the head, which is why back designs consistently look crisper than the same pattern placed elsewhere. If you’re choosing your first design, this is the placement most barbers recommend starting with.
Modern Geometric & Architectural Accent Designs
Modern barbering is now drawing heavy inspiration from architectural drafting and minimal graphic art. Sharp structural lines, bold angles, and clean geometric framing give your haircut a futuristic, clean aesthetic. These designs are perfect for guys who prefer structure and sharp precision over organic curves.
Here are 10 modern geometric and architectural-inspired designs:
14. Single Angular Razor Edge
A single, high-precision diagonal line between the hairline and the fade zone. It gives a sleek aesthetic and balances perfectly with a low taper fade.
- Best for: Straight hair, minimalists, office environments.
- Barber tip: “One single sharp diagonal line, ultra-thin with a razor-crisp finish.”
15. Parallel Linear Slits
Two sharp parallel lines carved at an exact 45-degree angle. Inspired by minimal graphic design, this detail looks incredibly futuristic from a front side angle.
- Best for: Short tops, buzz cuts, high-density dark hair.
- Barber tip: “Two parallel diagonal lines, precise 45-degree angle with equal spacing.”
16. Modern Cube Angle Cutout
A small geometric corner cutout made of sharp 90-degree angles. It gives the haircut a structural, architectural feel.
- Best for: Square face shapes, straight and coarse hair.
- Barber tip: “One small 90-degree angle box cutout, with sharp boxy corners.”
17. Chevron Arrow Edge
A V-shaped arrow design that creates a forward-motion feel. Matched with the lineup, it delivers an ultra-sharp visual impact.
- Best for: Sharp lineups, dark thick hair.
- Barber tip: “Single V-shaped chevron accent, sharp tip with clean straight edges.”
18. Minimalist Crosshatch Line
Two small razor lines that intersect each other at an angle. A subtle detail for those who like structural art.
- Best for: All hair types, professional settings.
- Barber tip: “A micro crosshatch pattern with two thin intersecting lines.”
19. Step-Down Linear Fade Accent
Inspired by an architectural stair-step design, where two or three vertical lines are cut in a descending, step-down order by height.
- Best for: High contrast dark hair, streetwear aesthetics.
- Barber tip: “A three-step linear stair design, with clean vertical alignment.”
20. Micro Triangle Accent
A small, perfectly symmetrical triangle cutout carved into the side profile zone of the scalp.
- Best for: First-timers, discreet corporate looks.
- Barber tip: “A small, symmetrical triangle shape, with completely clean sharp corners.”
21. Extended Geometric Linear Frame
A continuous straight line that travels from the front lineup all the way to the back taper gradient in a perfectly straight path.
- Best for: Oval and diamond face shapes, linear styles.
- Barber tip: Show a reference photo and say: “A continuous straight linear edge from front to back.”
22. Dual Corner Notch
Small symmetrical notches carved into both top corners of the lineup curve. An ultra-modern accent for sharp lineup lovers.
- Best for: Buzz cuts, short textured tops.
- Barber tip: “Identical micro notches on both side lineup corners.”
23. Asymmetrical Polygon Line
Sharp geometric lines with unequal angles that create a modern graphic art look.
- Best for: Creative lifestyles, dark afro-textured or curly hair.
- Barber tip: “An asymmetrical geometric polygon accent, with a clean razor finish.”
Key Point: Modern geometric designs focus on structure and precision. If you want your low taper fade to have a modern, crisp, and artistic finish, linear and architectural patterns deliver the best outcome.
Freestyle and Artistic Designs
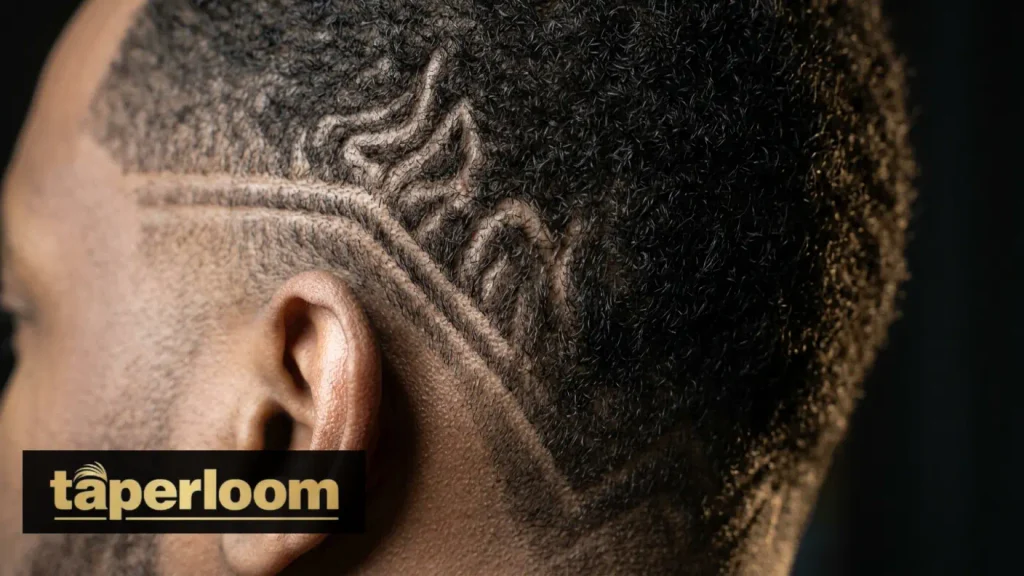
This is where a barber’s real skill shows. Freestyle designs don’t follow a template. There’s no fixed pattern to copy, just a T-outliner, a steady hand, and whatever image you and your barber agree on beforehand. Every freestyle cut is one of a kind, which is exactly the point.
Here are 10 freestyle taper fade designs that push past the standard line and shape work.
24. Abstract Freehand Design
No template, no reference grid, just your barber’s creativity working directly into the fade zone. The result is something no one else in the room is walking around with.
- Best for: curly hair, afro textured hair, dark hair
- Barber tip: Give your barber a mood direction instead of a fixed shape. Try “something fluid and modern” or “bold and geometric, you choose.”
25. Swirl or Spiral Design
Circular lines radiating out from a central point, carved with a spiral motion. It looks especially striking on close cropped tops, where the tight hair around it makes the spiral pop.
- Best for: buzz cuts, close cropped tops, afro texture
- Barber tip: “A spiral design at the nape, starting from a center point and radiating outward.”
26. Fluid Wave Design
Curved, flowing lines with no sharp angles, built to mimic natural movement. It pairs especially well with wavy or curly hair, since the carved pattern echoes the hair’s own texture.
- Best for: wavy hair, curly hair
- Barber tip: “Flowing wave lines, no sharp angles, keep it smooth and curved.”
27. Nature Inspired Design
Flame shapes, leaf patterns, or water ripple effects, etched freehand into the fade zone. These require real freehand etching skill, and the difference between a good barber and a great one shows up clearly here.
- Best for: dark afro textured hair, creative lifestyles
- Barber tip: Bring more than one reference image and talk through the exact shape with your barber before they start cutting.
28. Symbol or Logo Design
A recognizable symbol, icon, or small logo carved directly into the fade. This is the most personal version of a freestyle cut, since the symbol usually means something to you specifically.
- Best for: bold personalities, special occasions
- Barber tip: Keep the symbol simple enough for clean clipper lines. Overly detailed shapes blur within days.
29. Initial or Letter Design
Your initial, or a letter that means something to you, carved into the temple or nape. It’s personal without being loud, and it’s one of the easier freestyle options for a barber to execute cleanly.
- Best for: all hair types, especially dark or thick hair
- Barber tip: “My initial carved into the left temple, clean edges, bold lines.”
30. Number Design
A meaningful number, a jersey number, a birth year, carved into the fade zone. Keep it to one or two digits if you want it to actually hold its shape between visits.
- Best for: sports fans, all hair types
- Barber tip: Ask your barber to keep the digits large enough that the lines don’t collapse into each other after a few days of regrowth.
31. Portrait or Miniature Art Design
The most advanced freestyle work available, fine facial features, tiny scenes, or detailed logos carved into the fade. This one is for a barber with a genuine portfolio in this kind of work, not a general request.
- Best for: special occasions, showcase cuts
- Barber tip: Only book this with a barber who can show you prior portrait level work. Bring a printed reference photo, not just a phone screen.
32. Tribal Pattern Design
Bold, angular lines inspired by tribal art, carved in a continuous flowing pattern. It reads as more intentional and heritage inspired than a standard geometric shape.
- Best for: dark hair, afro textured hair
- Barber tip: “A tribal style pattern at the nape, bold angular lines, no gaps between sections.”
33. Layered Geometric Freestyle
Multiple geometric shapes combined into one larger freehand piece, triangles stacked against lines, or diamonds layered with a curve. It takes longer to carve than a single shape but reads as far more custom.
- Best for: thick hair, dark hair
- Barber tip: Sketch out roughly what shapes you want combined before you sit down, so your barber can plan the layout instead of building it entirely on the fly.
Key Point: Freestyle designs depend entirely on your barber’s freehand skill, not a template they’re copying. Always ask to see freestyle work in their portfolio before committing to anything beyond a basic line or shape.
Edgar Cut Combos
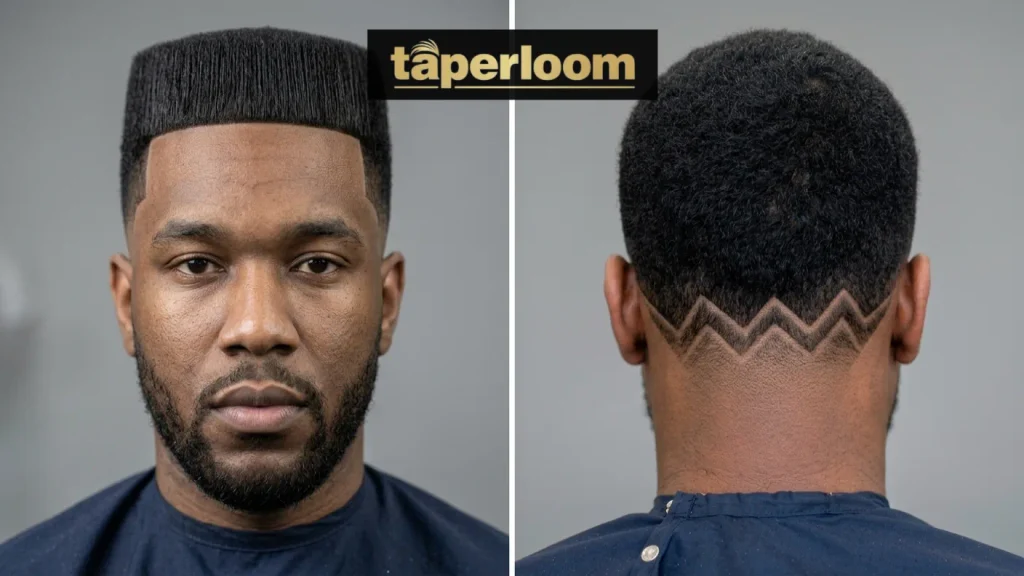
The Edgar cut, with its blunt flat fringe, has become one of the most searched haircuts on social media. Pair it with a low taper fade design, and you get a cut that looks sharp from the front and tells a whole different story from the back.
This combination is especially popular in Gen Z and Latino barbering culture, where the flat top of the Edgar contrasts hard against the tapered sides, and a carved design pushes that contrast even further.
Here are 8 Edgar cut and low taper fade design combos.
34. Edgar Plus Zigzag Nape
Textured or fluffy top, crisp low taper sides, and a Z pattern carved at the nape. Clean up front, artistic in the back, a complete look in one cut.
- Best for: thick hair, curly hair, dark hair
- Barber tip: “Edgar cut on top, low taper sides, zigzag at the back nape, keep it blended, not bald.”
35. Edgar Plus Double Line Side
Blunt fringe on top, double line carved above one ear. Sharp enough for weekends, still clean enough for school or work.
- Best for: straight or wavy hair, teenagers, young adults
- Barber tip: “Edgar cut, low taper, double line above the right ear.”
36. Edgar Plus Starburst Nape
A bold starburst carved at the nape underneath a flat Edgar top. The geometric detail at the back plays directly against the clean horizontal line of the fringe.
- Best for: dark hair, afro textured hair
- Barber tip: Bring a photo and ask for the starburst to sit centered at the nape, not off to one side.
37. Edgar Plus Freestyle Temple
Blunt fringe up top, freehand art carved into one temple. This combo works best when the top stays simple, so the freestyle side design gets the attention.
- Best for: dark, thick, curly hair
- Barber tip: “Edgar cut, low taper, freehand design above the left temple, you choose the pattern.”
38. Fluffy Edgar Plus Freestyle Back
A voluminous, textured Edgar top paired with tight low taper sides and a custom freehand design at the back. The soft, messy top against the sharp, precise carving underneath is the whole appeal here.
- Best for: thick, voluminous hair
- Barber tip: “Fluffy Edgar on top, blow dry with a diffuser, low taper sides, freestyle design at the back.”
39. Edgar Plus Geometric Side
A small triangle, diamond, or cross carved above the ear underneath an Edgar cut. The precision of the shape mirrors the precision of the blunt fringe up top.
- Best for: all hair types
- Barber tip: “Edgar cut with a small diamond above the ear, to match the sharpness of the fringe.”
40. Edgar Plus Behind Ear Line
Blunt fringe up top, a small discreet line carved behind the ear. It’s the most understated way to add personality to an Edgar cut without changing how it reads from the front.
- Best for: professional environments, conservative dress codes
- Barber tip: “Edgar cut, low taper, a small line behind my right ear, keep it subtle.”
41. Edgar Plus Curved Temple Line
A soft arc above the ear paired with a flat, blunt Edgar top. The curve softens the overall look, so it reads less severe than a straight line combined with a hard fringe edge.
- Best for: oval and round face shapes
- Barber tip: “Edgar cut, low taper, a curved line above the ear that follows my natural hairline.”
Key Point: An Edgar cut works as a frame for whatever design you carve underneath it. The flatter and cleaner the fringe, the more the design at the back or side stands out by contrast.
Small and Subtle Professional Designs

Not every design needs to be a statement piece. A lot of guys just want a hint of personality without a full commitment, especially if they work somewhere strict about grooming. Simple line work and small shapes remain the most requested category for exactly this reason.
Here are 10 small and subtle taper fade designs built for first timers and professional settings.
42. Micro Single Line
One fine razor line, barely an inch and a half long, at the temple. It’s discreet enough that most people won’t notice unless they’re looking for it. You’ll know it’s there.
- Best for: professional environments, first time design wearers
- Barber tip: “The thinnest, cleanest single line you can do above my right ear.”
43. Subtle Nape Line
A single horizontal line across the neckline at the base of the fade. It frames the nape and defines the bottom of the cut without drawing extra attention.
- Best for: all hair types, professional settings
- Barber tip: “One clean line right at the nape, thin and precise.”
44. Small Diamond
A tiny geometric diamond above one ear. Small enough to stay subtle, precise enough to still look intentional.
- Best for: fine or straight hair, office friendly
- Barber tip: “A small diamond above my left ear, equal sides, sharp corners.”
45. Short Arc Line
A brief curved line above the ear, under two inches long. It reads softer than a straight line and works especially well if you have a round or oval head shape, since the arc echoes the natural curve.
- Best for: oval and round face shapes
- Barber tip: “A short arc above the ear, following my hairline curve.”
46. Dot Cluster
Small staggered dots etched into the fade, understated and textured. Most people won’t even register it as a design, it just reads as part of the haircut.
- Best for: dark hair, close cut tops
- Barber tip: “A small cluster of dots above the ear, spaced evenly, not too large.”
47. Mini Hard Part
A razor sharp side part shaved directly into the hairline. It’s not a traditional carved design, but it’s a precision detail that elevates the whole cut without looking flashy.
- Best for: comb over styles, slicked back tops
- Barber tip: “A clean shaven hard part on the left side, sharp and defined.”
48. Subtle Behind Ear Line
A small line carved behind the ear, invisible until you tilt your head. This is the most discreet placement on the entire list, and it’s a solid option if visible designs aren’t allowed where you work.
- Best for: corporate professionals, formal settings
- Barber tip: “A short line behind my right ear, keep it small and hidden.”
49. Single Curved Temple Line
One soft arc above the ear, arguably the most professional friendly design option here. Clean, refined, and easy to keep looking sharp between visits.
- Best for: all face shapes, all hair types, all settings
- Barber tip: “A curved single line above the ear, follows the natural shape, nothing too dramatic.”
50. Faint Zigzag Micro Line
A miniature zigzag, no more than an inch long, tucked just above the ear. It gives you the shape of a bolder design at a fraction of the visibility.
- Best for: fine hair, professional settings
- Barber tip: “A very small zigzag above my ear, keep it tight and short, nothing bold.”
51. Single Notch
One small triangular notch cut into the hairline near the temple, a detail more than a design. Barely noticeable in person, but it adds a sharp edge to the overall shape.
- Best for: straight or fine hair, office environments
- Barber tip: “A single small notch at my temple hairline, subtle, not a full triangle shape.”
Key Point: Small designs hold their shape longer between touch ups than bold or freestyle work, since there’s less carved detail for regrowth to blur. If you’re not sure how often you can get back to the barbershop, start here.
Trending 2026 and Celebrity Inspired Designs
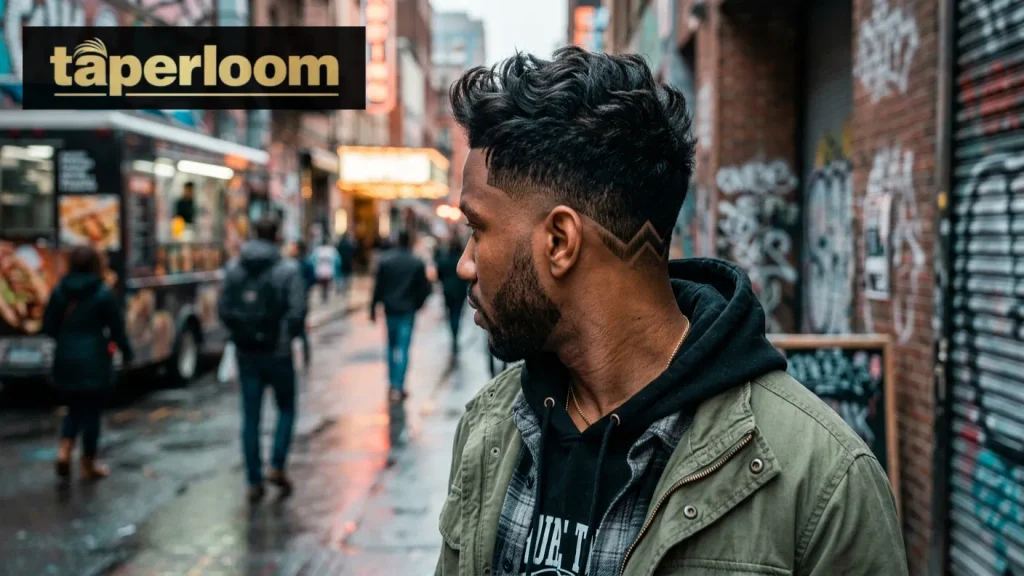
Here are the design directions dominating barbershops and social feeds heading into 2026, plus how to translate a viral look into something your barber can actually execute.
52. Streamer Style Zigzag Stack
Inspired by the gaming and streaming world, where bold, high contrast back designs get filmed constantly for content. This is a stacked set of zigzags rather than a single line, carved to read clearly even on a low resolution video call or stream overlay.
- Best for: dark hair, thick hair, content creators
- Barber tip: “Stacked zigzag lines at the nape, keep the spacing tight so it reads clearly on camera.”
53. Athlete Inspired Number and Line Combo
A jersey style number paired with a single supporting line, a look borrowed heavily from sports culture and locker room barbershop trends. Clean, masculine, and instantly recognizable.
- Best for: sports fans, all hair types
- Barber tip: “A one or two digit number at the temple, paired with a single straight line underneath it.”
54. K Style Textured Top with Side Micro Design
A soft, textured, slightly longer top paired with a tiny geometric shape or line at the temple, a combination that’s taken off through K pop and K drama influenced grooming trends.
- Best for: straight and wavy hair, fashion forward guys
- Barber tip: “Textured, slightly longer top with soft movement, low taper sides, a small geometric shape above one ear.”
55. Latin Trap Style Full Wrap
A bold, continuous design that wraps from the temple around to the nape, popularized through Latin trap and reggaeton visual culture. It’s a full commitment piece, not a subtle add on.
- Best for: dark hair, curly hair, bold personalities
- Barber tip: Bring multiple reference angles, since a wrap design needs to be planned as one continuous piece, not built section by section.
56. Soft Boy Curved Line Aesthetic
A gentle curved line replacing the traditional straight razor cut, part of a broader shift toward softer, less aggressive design lines seen across 2026 grooming trends.
- Best for: all hair types, guys who want detail without harshness
- Barber tip: “A soft curved line instead of a straight one, keep the angle gentle, nothing sharp.”
57. Viral Freehand Symbol
A small, simple symbol carved freehand, the kind that spreads fast on short form video because it’s quick to spot and easy to copy. Think basic shapes rather than anything overly detailed.
- Best for: dark hair, social media focused guys
- Barber tip: Keep the symbol under two inches wide. Anything larger loses definition on camera and in person after a few days of regrowth.
58. Two Tone Design with Color
A carved line or shape combined with a subtle color highlight along the edge, a trend gaining traction as more barbershops add color services alongside cutting. Requires a barber comfortable with both skills.
- Best for: dark hair, guys open to color, special occasions
- Barber tip: Confirm your barber does color work in house or ask for a referral before booking, since not every barbershop offers both services.
59. Minimalist Grid Line Design
A small grid or crosshatch pattern, a cleaner and more geometric evolution of the checkerboard trend that’s been spreading through minimalist barbershop content online.
- Best for: short, dark hair
- Barber tip: “A small, tight grid pattern at the temple, evenly spaced lines, keep it compact.”
Key Point: Trend driven designs move fast, what’s viral this year won’t necessarily be requested next year.
If you want longevity from your design rather than a moment, lean toward the classic categories above and treat this section as inspiration rather than a rulebook.
Designs by Hair Type
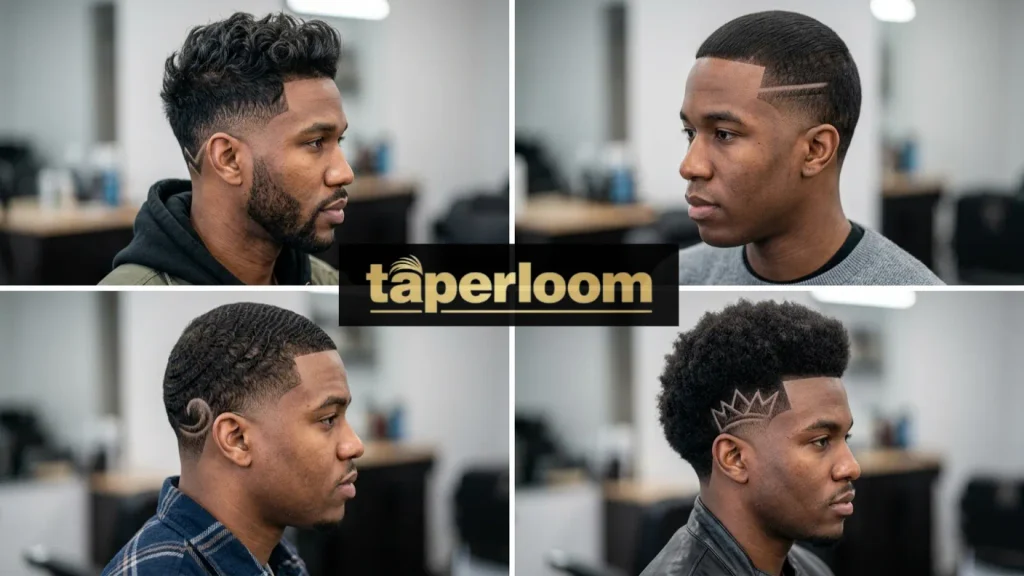
The best design for you depends heavily on your hair texture, sometimes more than it depends on personal taste.
The same pattern can look completely different depending on how thick, curly, or fine your hair is. Here’s what actually works best for each texture, plus a few combos not covered in the placement sections above.
Low Taper Fade Designs for Curly Hair
Curly hair already brings volume and texture to the table, so the goal with a design isn’t to fight that, it’s to let the carved lines contrast against it. The tighter and more defined your curl pattern, the sharper the design reads underneath it.
Best Designs:
- 60. Back Geometric Plus Curly Top: A clean geometric shape at the nape under a full curly top. The soft curls up top and the sharp lines at the back create real contrast.
- 61. Starburst Plus Curly Afro: A centered starburst at the nape under a rounded, shaped afro. The radiating lines echo the rounded shape of the afro itself.
- 62. Freestyle Curly Blowout Plus Back Design: A voluminous blowout on top paired with a freestyle design carved at the nape. The contrast between the fluffy top and the precision at the back is the whole point here.
Styling tip: Use a curl cream or leave in conditioner to define your curls without weighing them down, and keep any product away from the fade zone itself so it doesn’t blur the design.
Low Taper Fade Designs for Straight Hair
Straight hair shows off design clarity better than almost any other texture, since there’s no natural texture competing with the carved lines for attention.
Best Designs:
- 63. Double Line Temple Plus Comb Over: Two clean temple lines paired with a sleek, side swept comb over. Polished and precise, this reads as boardroom ready without losing any edge.
- 64. Single Back Line Plus Slick Back: A clean nape line under a fully slicked back top. Probably the most refined combination on this entire list.
- 65. Hard Part Plus Textured Crop: A shaved hard part on one side paired with a short, textured crop on top. Sharp, low maintenance, and easy to style day to day.
Styling tip: Straight hair can look flat without product. A water based pomade or texture clay adds dimension on top without interfering with the fade zone.
Low Taper Fade Designs for Wavy Hair
Wavy hair naturally has movement, so designs that echo that movement, curves instead of straight lines, tend to look the most intentional on this texture.
Best Designs:
- 66. Wave Pattern Plus Natural Wavy Top: A carved wave design at the back that mirrors the natural wave texture on top. Cohesive and clearly planned rather than random.
- 67. Curved Arc Side Design Plus Textured Top: A soft arc above the ear paired with a loose, textured top. The curve in the design mirrors the natural curve of the waves above it.
Styling tip: Blow dry while scrunching with your fingers to lift the natural wave, then add a texture powder for grip and volume that lasts through the day.
Low Taper Fade Designs for Afro Textured Hair
Afro textured hair pairs especially well with bold, high contrast designs, since the density and tight curl pattern keeps the fade zone fully visible around whatever’s carved into it.
Best Designs:
- 68. Bold Geometric Back Plus Shaped Afro: A bold diamond or cross design at the nape under a fully shaped afro. Maximum contrast, maximum visual impact.
- 69. Lightning Bolt Side Plus Natural Afro: A lightning bolt above the ear under a full, natural afro. The tight curl pattern doesn’t cover the fade zone, so the bolt stays fully visible.
- 70. Starburst Nape Plus Blowout Taper: A starburst at the nape under a blowout taper. One of the most visually dynamic combinations on this whole list.
Styling tip: A twist cream or curl defining product keeps the top’s shape intact, and a sulfate free shampoo helps balance moisture so the fade zone stays looking fresh between visits.
Best Design for Your Face Shape
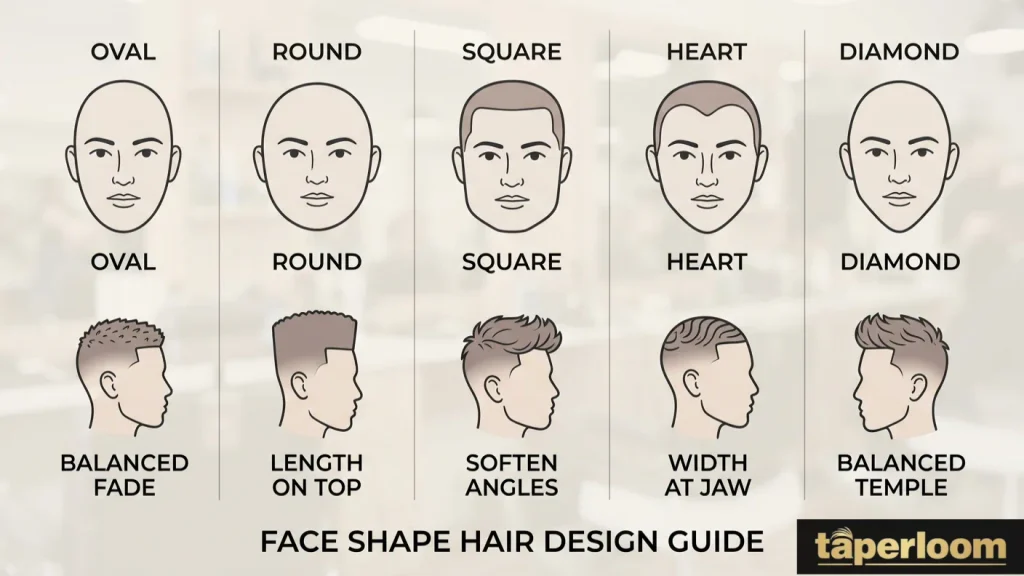
Most guides mention face shape as an afterthought. It shouldn’t be. The right design can balance the proportions of your face, and the wrong one can exaggerate the exact thing you’re trying to soften. Here’s what actually works for each shape.
Oval Face Shape
Oval is considered the most balanced face shape, which means you have the most flexibility. Almost any design works here, from sharp geometric shapes to soft curved lines.
- Recommended designs: Single Temple Line (#14), Zigzag Nape Design (#1), Geometric Diamond Design (#6)
- Why it works: With balanced proportions already in place, you can lean into bolder designs without worrying about exaggerating any one feature.
Round Face Shape
Round faces benefit from designs that add vertical lines or angular structure, since these create the illusion of length and definition that a round face naturally lacks.
- Recommended designs: Arrow Nape Design (#8), Triangle Temple Cutout (#23), Single Notch (#51)
- Why it works: Vertical and angular lines break up the roundness and add visual sharpness where the face is naturally softer.
Square Face Shape
Square faces already have strong, angular bone structure, so geometric designs complement rather than compete with the jawline.
- Recommended designs: Geometric Temple Pattern (#18), Cross Nape Design (#10), Layered Geometric Freestyle (#33)
- Why it works: Sharp angles in the design echo the sharp angles of the jaw, creating a look that feels deliberate and cohesive rather than mismatched.
Heart Face Shape
Heart shaped faces are wider at the forehead and narrower at the chin, so side and temple designs work better here than back designs, since they help balance the width up top.
- Recommended designs: Curved Temple Line (#16), Behind Ear Design (#20), Single Curved Temple Line (#49)
- Why it works: Side placed designs draw attention toward the temple area, which softens the visual weight of a wider forehead.
Diamond Face Shape
Diamond faces are widest at the cheekbones and narrower at both the forehead and jaw. Designs that add width or detail near the temple and jawline help balance this out.
- Recommended designs: Double Temple Line (#15), Temple Design with Beard Fade Combo (#19), Small Diamond (#44)
- Why it works: Adding visual detail near the temples and blending into a beard fade broadens the narrower parts of the face, balancing out the width at the cheekbones.
Key Point: Face shape compatibility isn’t a strict rule, it’s a starting point. If you love a design that isn’t technically “recommended” for your face shape, a good barber can usually adjust the placement or size slightly to make it work.
How Barbers Create These Designs (Step by Step)
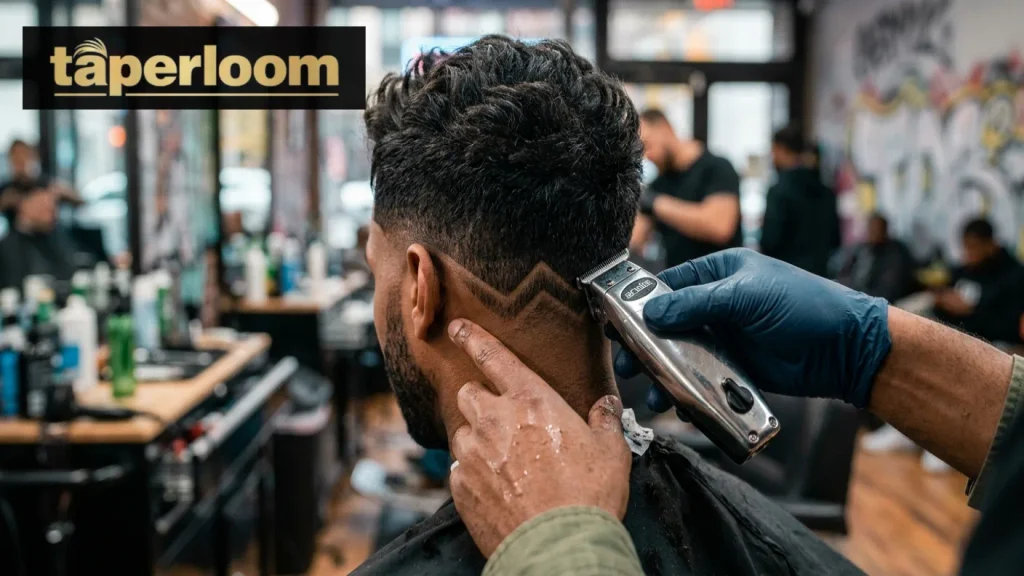
Here’s exactly how a skilled barber takes a design from an idea to a finished cut. Every step matters, and skipping one usually shows up in the final result.
Step 1: Consultation
Your barber talks through your face shape, hair type, and lifestyle before touching a clipper. This is where you explain how short you want the fade, where it should start, and how you want the top styled. Bring reference photos from multiple angles here, not just one.
Step 2: Initial Clipper Pass
The barber starts with a number 2 or number 3 guard to remove bulk and set the overall length. The fade line gets established just above the ears and around the nape, low, never more than an inch above the ear.
Step 3: Blending the Fade Gradient
Guard sizes step down gradually, 3 to 2 to 1.5 to 1 to 0.5 to skin. Clipper over comb and scissor over comb techniques create the smooth gradient that makes a low taper fade look seamless instead of choppy.
Step 4: Creating the Design
Once the fade is fully blended, the barber switches to a T-outliner or detailer trimmer for precision work. Geometric patterns usually get mapped out first with light guide lines. Freestyle designs are carved directly, freehand, straight into the blended fade zone. A straight razor comes in for the finest detail work, especially on curved lines or small text.
Step 5: Neckline Finish
The neckline gets defined, squared, rounded, or naturally tapered depending on your preference. A foil shaver cleans up any stray hairs left behind.
Step 6: Final Styling
The barber checks the design from every angle, front, side, and back, then applies a styling product suited to your hair type, texture clay, pomade, or molding paste, to finish the look.
Key Tip: The design always gets carved after the fade is fully blended, never before. Etching a pattern into an unblended fade creates uneven contrast that never quite looks right, no matter how clean the design itself is.
How to Ask Your Barber for a Design
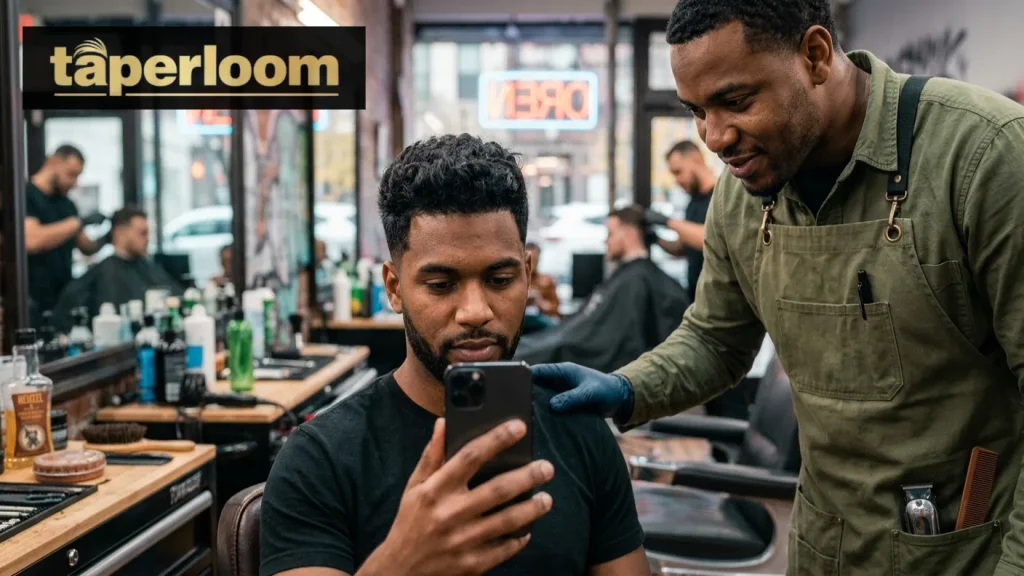
The difference between walking out with the design you wanted and walking out disappointed almost always comes down to communication, not skill. Here’s exactly how to get it right.
Step 1: Bring three reference photos One front, one side, one back. Save these on your phone before you sit down. Try to find photos of someone with a similar hair texture to yours, since the same design can look different depending on the hair it’s carved into.
Step 2: Specify your fade height clearly Say something like, “I want a low fade starting just above the ears, not going higher than an inch above them.” The word “low” means something different to every barber, so being specific here removes the guesswork.
Step 3: Name the design type directly Say exactly what you want. “I want a zigzag pattern etched into the back of my nape” or “I want a double line above my left temple.” Avoid vague requests like “something cool.”
Step 4: Confirm the placement Back, side, temple, behind the ear, or both sides, be specific about exactly where the design goes and how far it extends.
Step 5: Describe the size “Small and subtle” reads very differently from “bold and visible.” If you’re open to your barber’s creative judgment, say so directly.
Step 6: Confirm your top style Textured top, Edgar cut, crop, buzz cut, or natural curls, your top style changes how the overall design reads once it’s finished.
Example Barber Script: “I want a low taper fade, keep it low, just above the ears. Add a double line design on both sides at the temple. Keep the neckline clean and squared. Leave the top textured with natural movement.”
Quick Checklist Before You Sit Down:
- Three reference photos saved and ready to show
- Fade height specified in plain language
- Design type named clearly, not described vaguely
- Placement confirmed, back, side, or both
- Size and boldness described
- Top style agreed on
Key Tip: Book a morning appointment if you can. A barber’s hand is steadiest early in the day, before six or seven clients have come through the chair.
How Much Does a Low Taper Fade Design Cost?
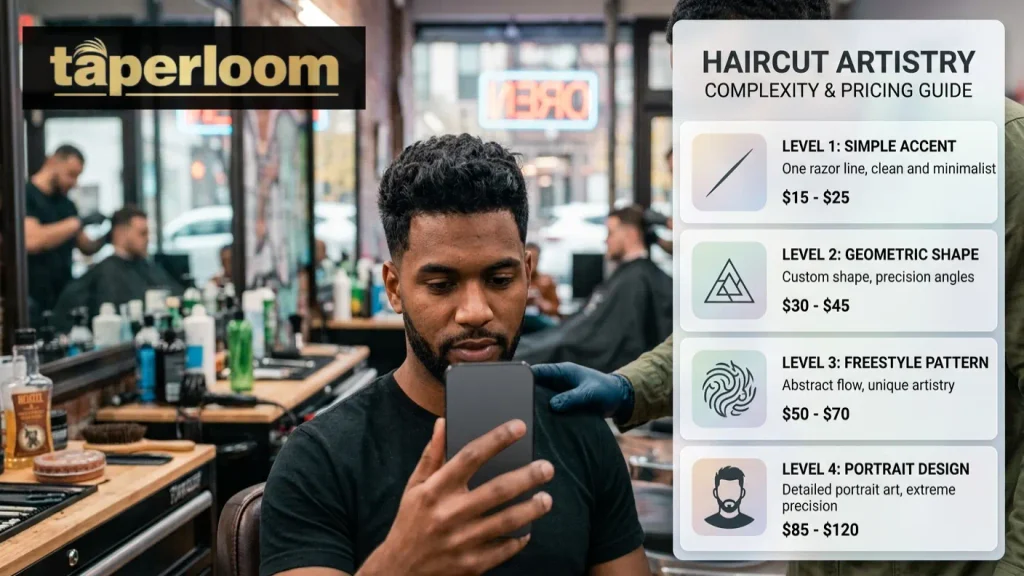
A standard low taper fade typically runs $25 to $50, depending on your barbershop and location. Adding a carved design usually adds anywhere from $10 to $60 on top of that, depending on how complex the pattern is and how long it takes your barber to execute it.
| Design Complexity | Examples | Typical Extra Cost | Time Added |
| Simple | Single line, double line, small diamond | $10 to $20 | 5 to 10 minutes |
| Moderate | Zigzag, geometric shapes, curved lines, initials | $20 to $35 | 10 to 20 minutes |
| Complex | Starburst, full side wrap, layered geometric freestyle | $35 to $50 | 20 to 35 minutes |
| Advanced or portrait style | Portrait art, miniature scenes, detailed symbols | $50 to $100 plus | 35 to 60 minutes or more |
What affects the price beyond complexity:
- Barber experience: A barber known specifically for freestyle or portrait work usually charges more than a general barber offering line work as an add on
- City and shop type: Prices in major cities and upscale barbershops tend to run higher than smaller towns or budget shops
- Color add ons: If you’re combining a design with a color highlight, expect an additional charge on top of the design cost itself
- Touch up pricing: Many shops charge a reduced rate, often $10 to $15, for a quick line touch up between full cuts
Key Tip: Always ask for the design price before you sit down, not after.
Best Styling Products by Hair Type
The right product keeps your top looking sharp and your design fully visible. The wrong one, especially anything too heavy, can fill in the carved lines and blur the whole point of getting a design in the first place.
A general rule before the breakdown: apply product only on the top section of your hair. Keep pomade, clay, and paste away from the fade zone and the carved design itself.
For Curly Hair
- Curl cream: defines your curl pattern without weighing it down
- Leave in conditioner: hydrates curls and cuts down on frizz near the fade line
- Argan oil: seals in moisture and adds natural shine without heaviness
For Straight Hair
- Texture clay: matte finish, light hold, adds structure to hair that would otherwise sit flat
- Water based pomade: flexible hold, ideal for comb overs or slicked back styles
- Molding paste: natural finish, medium hold, good for everyday texture
For Wavy Hair
- Sea salt spray: enhances your natural wave pattern without extra product weight
- Texture powder: adds volume and grip, especially useful for finer wavy hair
- Styling cream: light hold that lets natural wave movement come through
For Afro Textured Hair
- Twist cream: defines coils and separates texture cleanly for a shaped look
- Sulfate free shampoo: helps maintain moisture balance between wash days
- Clarifying shampoo: deep cleans before styling for a fresher looking fade underneath
Key Tip: If you’re not sure which product category fits your hair, start light.
How to Maintain a Low Taper Fade Design
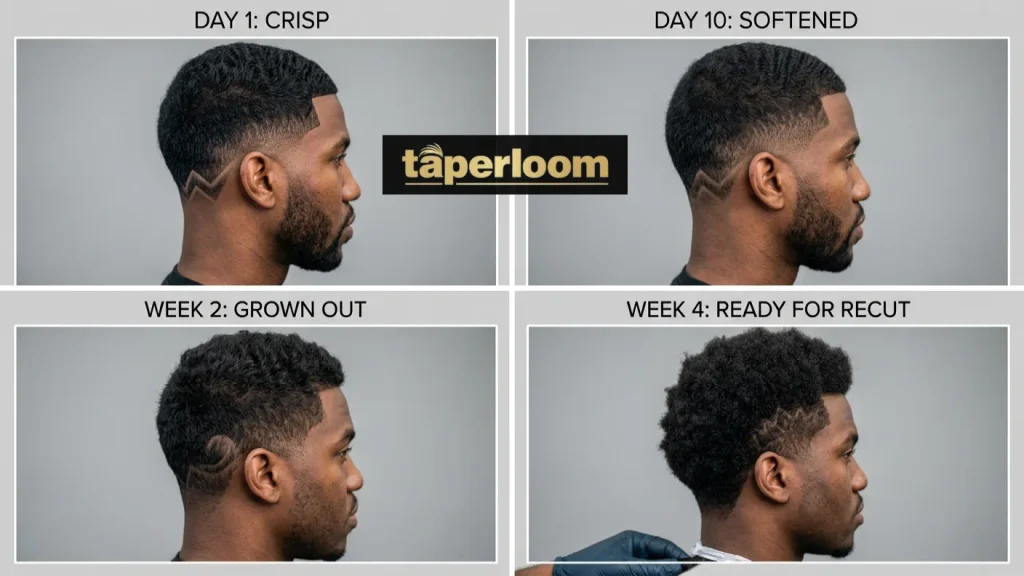
A low taper fade design looks its sharpest in the first week after your cut. After that, natural hair regrowth gradually softens the carved edges.
| Time After Cut | Design Appearance | Recommended Action |
| Day 1 to 7 | Crisp, sharp, full contrast | No action needed, just enjoy it |
| Day 7 to 10 | Slight softening at the edges | Optional at home trimmer touch up |
| Day 10 to 14 | Design starting to blur | Book a barber touch up appointment |
| Week 2 to 3 | Noticeable regrowth | Full barber visit recommended |
| Week 3 to 4 | Design largely grown out | Full re cut and redesign |
Six maintenance habits that actually extend the life of your design:
- Book weekly touch ups if you can. Designs fade fastest at the edges, and a quick neckline or line cleanup between full cuts keeps everything looking fresh.
- Keep a T-outliner at home. A detailer trimmer lets you freshen up simple line designs yourself between barber visits, though anything freestyle should stay with your barber.
- Keep styling product away from the fade zone. Product buildup accelerates blur, especially around fine line work.
- Moisturize the scalp in the fade area. This matters most for skin level fades, where dry skin can make the design look duller than it actually is.
- Wear a durag or wave cap at night. This protects the alignment of your design while you sleep.
- Schedule barber visits every two to three weeks. This window keeps most fade styles looking sharp.
Key Tip: Simple designs, single lines, small shapes, hold their definition noticeably longer than freestyle or portrait work.
Mistakes to Avoid
1. Placing the design too high
A design should sit inside the fade zone, not above it.
2. Over detailing with too many lines
More lines don’t automatically mean a better design. A cluttered design loses its visual clarity within days.
3. Carving the design before the fade is blended
The fade needs to be fully blended first, every time.
4. Skipping the reference photo
Without a clear reference image, there’s real room for misunderstanding around exactly what you want.
5. Bringing only one front facing photo
Bring a front, side, and back photo so your barber can see the full picture.
6. Using the wrong tools for at home touch ups
Regular clippers can’t create crisp design lines. A T-outliner or detailer trimmer is the right tool.
7. Ignoring hair type compatibility
Match the complexity of the design to your actual hair texture, not just the photo you liked.
8. Neglecting maintenance appointments
Skipping touch ups is the fastest way to lose a design you paid extra for.
9. Choosing a design without checking your barber’s portfolio
Ask to see photos of similar designs they’ve done before, especially for anything beyond a basic line.
Key Tip: Most of these mistakes come down to communication gaps, not barber error.
Real Examples: Before and After
[Publisher note: add 4 to 6 genuine before-and-after photo pairs from your barbershop or contributing barbers here, with permission to publish. Caption each with design name, hair type, and days since the cut. Video clips of the carving process (15 to 20 seconds) add extra credibility. See production notes below for layout and alt text template.]
Frequently Asked Questions
How long does a low taper fade design last?
A low taper fade design stays crisp for 7 to 10 days before regrowth starts to soften the edges. Simple designs like single lines hold their shape longer than detailed freestyle work.
What is the difference between a low taper fade and a skin fade?
A low taper fade keeps soft hair at the bottom and starts fading just above the ears, while a skin fade blends all the way down to bare scalp. Skin fades create more dramatic contrast, while low tapers look more subtle and professional.
Can I get a low taper fade design on curly hair?
Yes, curly hair is actually one of the best textures for carved designs. The natural volume on top creates strong contrast against precision etched lines at the nape or temple.
How much does a low taper fade with a design cost?
A standard low taper fade runs $25 to $50, and adding a design typically costs another $10 to $60 depending on complexity. Portrait style or advanced freestyle work can run higher.
What is a freestyle low taper fade design?
A freestyle design means no fixed template, your barber carves a custom pattern freehand based on your direction. Each one is one of a kind and requires a barber with strong freehand skill.
What is an Edgar cut with a low taper design?
The Edgar cut pairs a flat, blunt fringe on top with a low taper fade and a carved design at the back or side. It’s especially popular in Gen Z and Latino barbering culture and dominates social platforms under tags like #edgar and #lowtaper.
Are low taper fade designs professional or work appropriate?
Small, subtle designs like a single temple line or a discreet nape line are widely considered appropriate for most workplaces. Bold freestyle or full wrap designs may not suit stricter corporate settings.
What is a small taper design?
A small taper design is a minimal carved pattern, usually a single line, micro diamond, or short arc, placed subtly within the fade zone. It’s the easiest starting point for first time design wearers.
How do I choose the right low taper fade design for my face shape?
Oval faces suit almost any design, round faces benefit from vertical or angular lines, and square faces pair well with geometric shapes. Heart and diamond faces do best with side or temple placed designs that balance width.
How often do I need a touch up for a low taper fade design?
Most designs need a touch up every 2 to 3 weeks to stay sharp, though simple line designs can sometimes stretch to 3 to 4 weeks. Complex freestyle work often needs touch ups closer to the 10 to 14 day mark.
Can I do a low taper fade design touch up at home?
Yes, for simple line designs a T-outliner or detailer trimmer works well between barber visits. Regular clippers can’t create clean design lines, so avoid using those for touch ups.
What tools do barbers use to carve these designs?
Barbers typically use a T-outliner or detailer trimmer for precision line work, and a straight razor for the finest detail. The design always gets carved after the fade is fully blended, never before.
Read Next : Low Taper Fade Straight Hair: Complete Guide, Styles & Barber Tips

Muhammad Kaleem is a content creator who writes about hair care, hairstyles, grooming, and everyday hair trends. He enjoys turning hair-related topics into simple, practical, and easy-to-understand content that helps readers make informed choices about their hair and personal style.